3D Print Projects

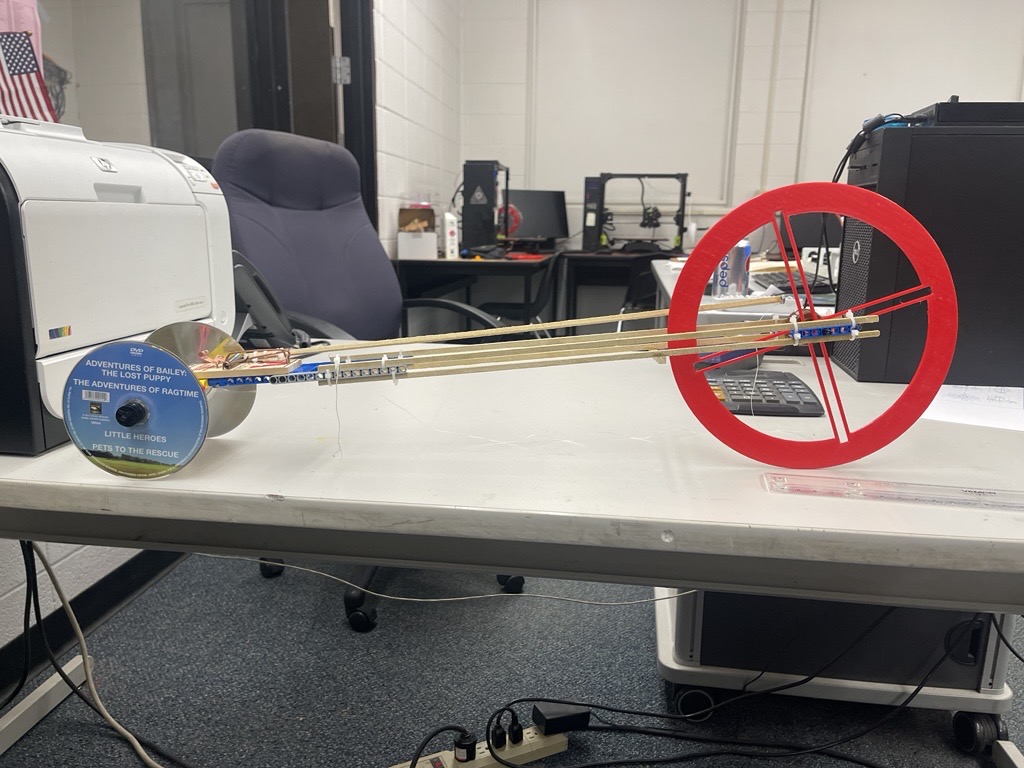
Beginning with my time at Collins Aerospace, 3D printing, specifically fused deposition modeling (FDM), became a very prevalent part of my engineering wheelhouse. I had small exposures here and there leading up to my Collins experience, such as in high school with a mouse-trap car I built. The engineering behind it was pretty poor (I overbuilt it), but it allowed me to be exposed to the technology.

image (22)

High school mousetrap car with 3D printed real wheel in red
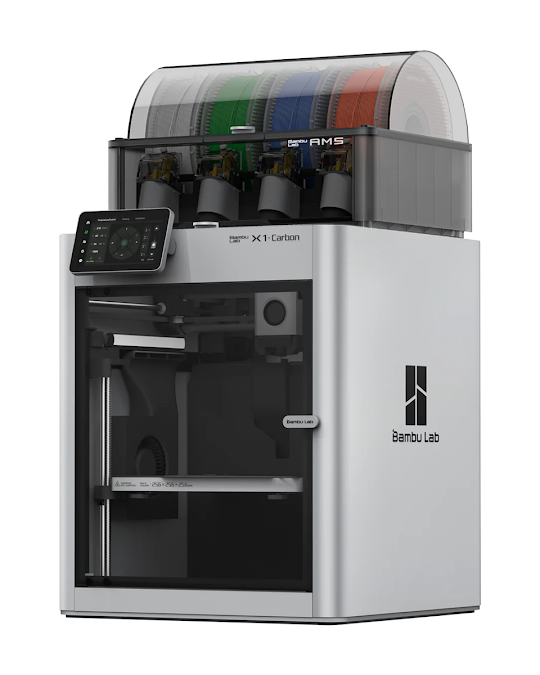
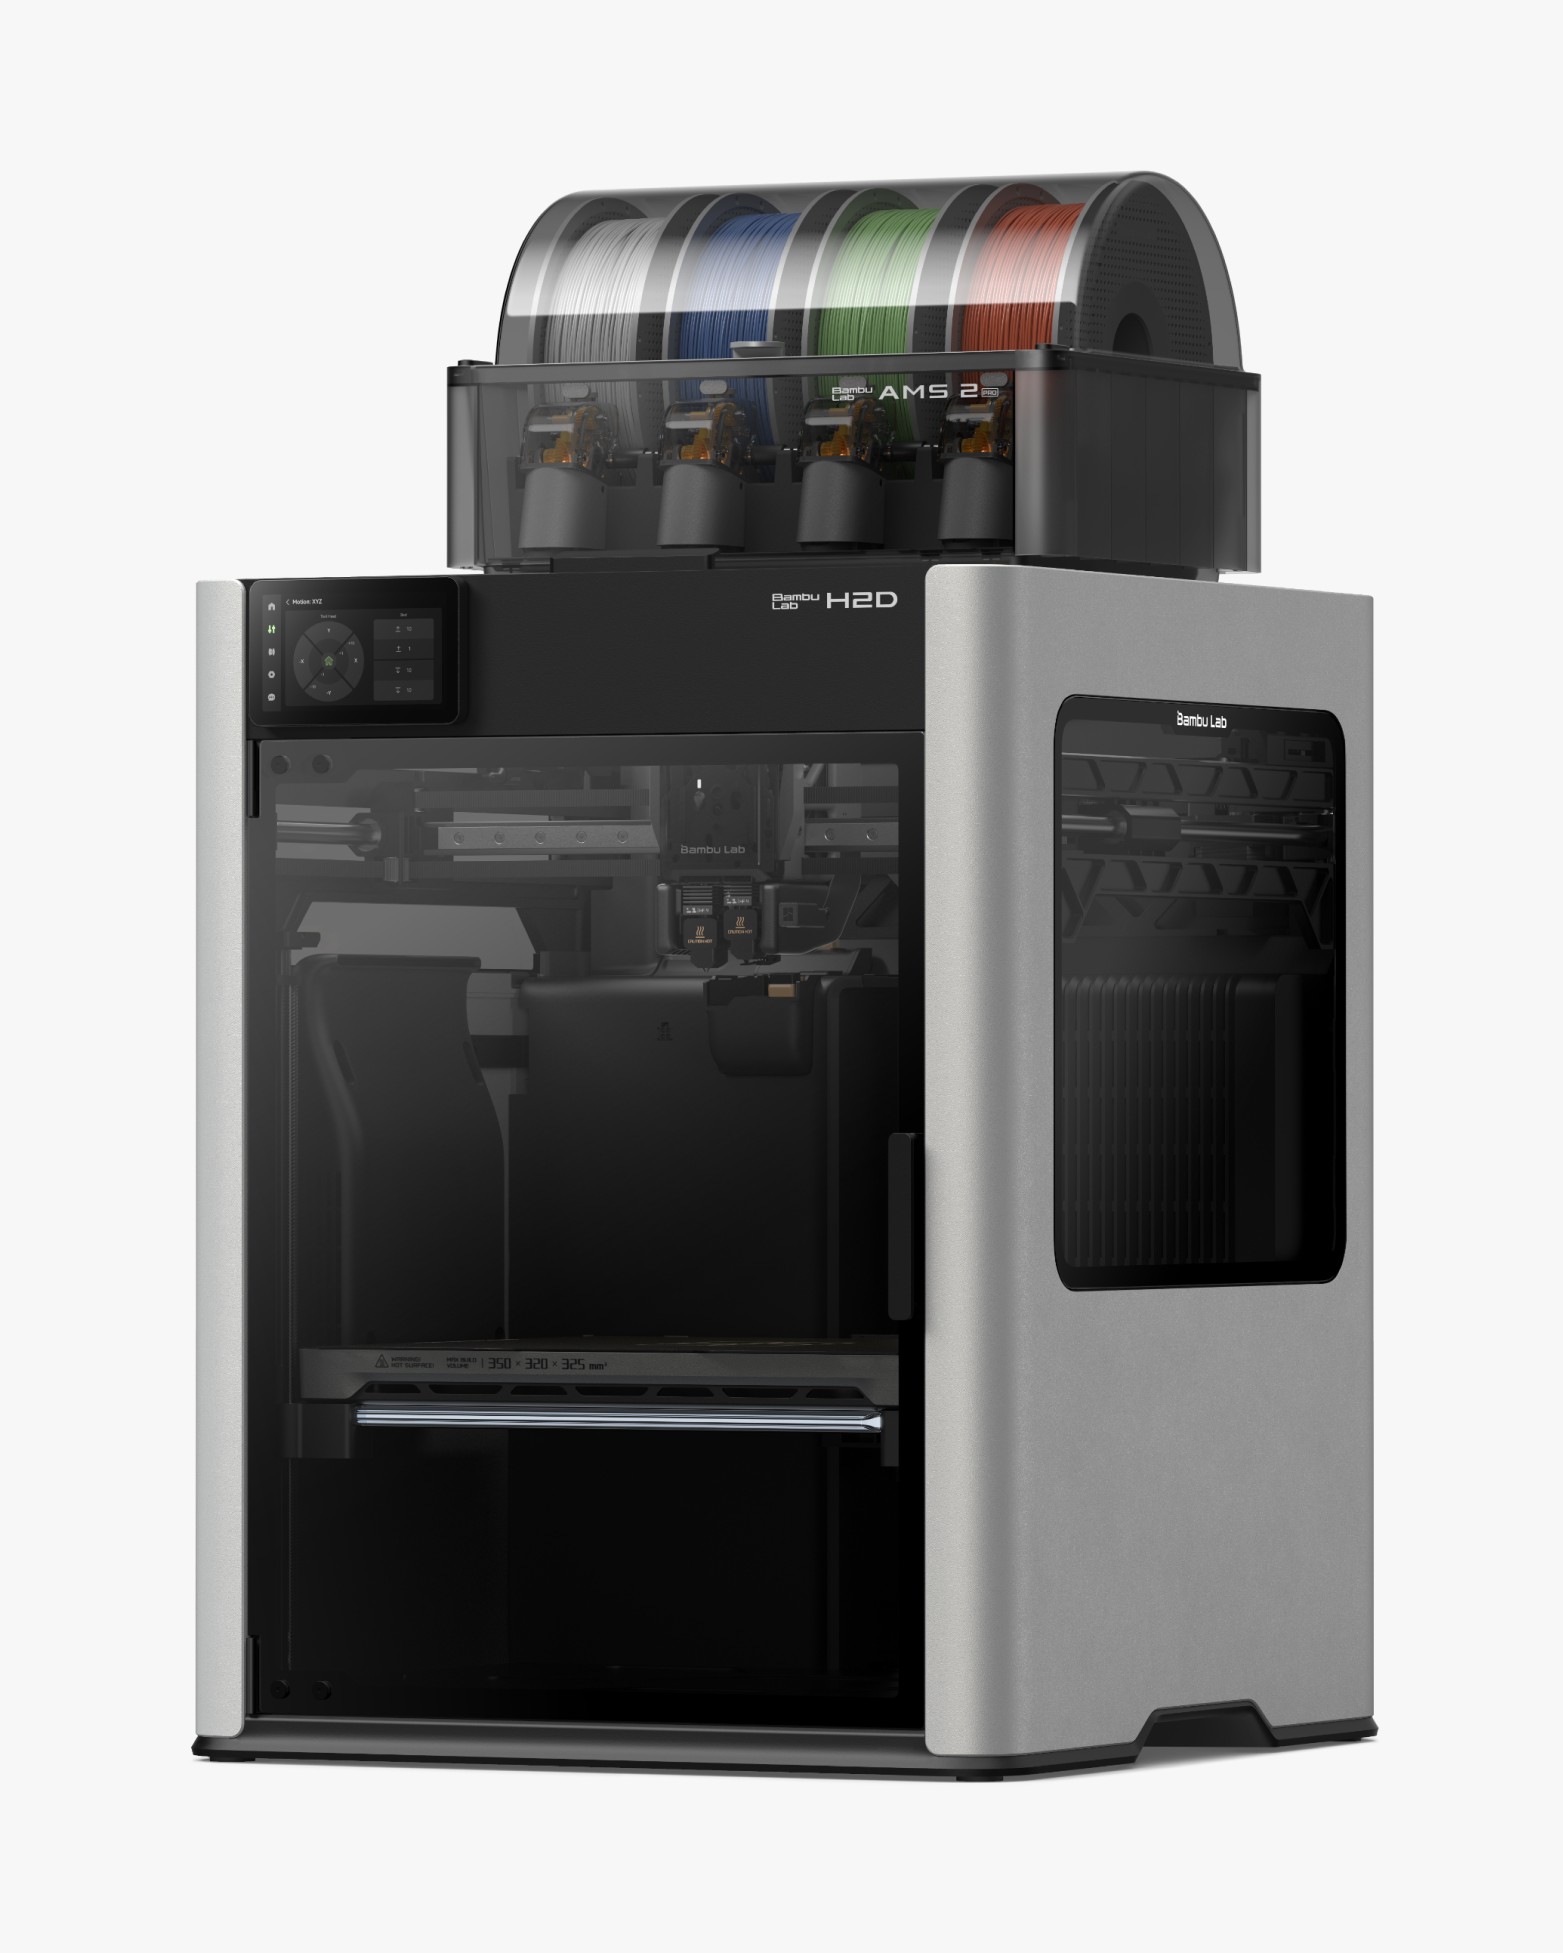
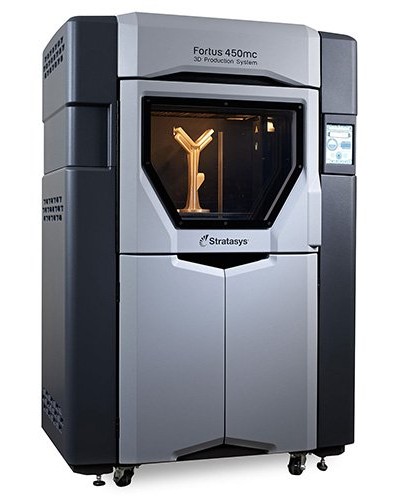
At Collins, many of my projects were FDM 3D-printed fixtures and jigs for the manufacturing floor. I was quickly exposed to the vast number of possibilities (as well as limitations) of 3D printing applications, from rapidly prototyping rough ideas to finalized manufacturing jigs used in the production process. The desktop printers I had access to were Bambu Lab X1C’s and H2D’s, as well as a Stratasys Fortus 450mc 3D Printer for more professional projects. The Bambu printers provided a quick, reliable way to print projects not reliant on exact tolerances and gave me an inlet to tinker and fix it every time I broke it (not uncommon). The Stratasys, although a more time-consuming, tedious process, was unrivaled in its ability to print tightly-tolerance parts with almost zero shrinkage.

From left to right: Bambu Labs X1 Carbon, Bambu Labs H2D, Statasys Fortus 450mc

These experiences with 3D printing had me hooked, and I ultimately purchased my own X1C for my 21st birthday in 2025. With this purchase came a slew of 3D printing projects, including (from newest to oldest) a dress clip, personalized trash cans, Stanley water bottle lid toppers, and engine block phone stand. The projects below detail the more fun projects I was able to create over the past year with my X1C.

Tutoring Display Hooks for Little Brother’s Sword

img 2473

My most recent 3D printing project came in the form of teaching my little brother CAD and 3D printing. To the dismay of my mom, my Percy Jackson-loving little brother wanted a sword for Christmas, so you can only imagine what I gave him. However, there are few ways a fifth grader can play with a real metal sword, so it camped under his bed for a while. In discussing ways to potentially display it, I offered to teach him how to design and make his very own display hooks via 3D printing, and he was excited.

The first step was to decide how to display the sword. My little brother determined that using hooks would allow the sword to be seen, and he wanted it to be displayed horizontally. Thus, 3 hooks were decided upon to hold the sword up: 2 flanking the rain-quard, and one near the end of the blade.

The CAD of choice was FreeCAD. Free options that would run on my little brother’s non-engineering laptop were scarce, and FreeCAD offered more flexibility at the cost of simplicity, so that was chosen for the custom hooks. Then, via Google Meet, we scheduled a call to get the software set up and began designing. I explained to him the various basic functions of the software, as well as how to visualize a product as various extruded sketches. From there, I helped explain the importance of dimensions and tolerancing compared to the real world.

Allowing him to complete the design and only instructing him through points of friction, my brother was extremely quick to learn, and we had a hook modeled in less than a couple hours.

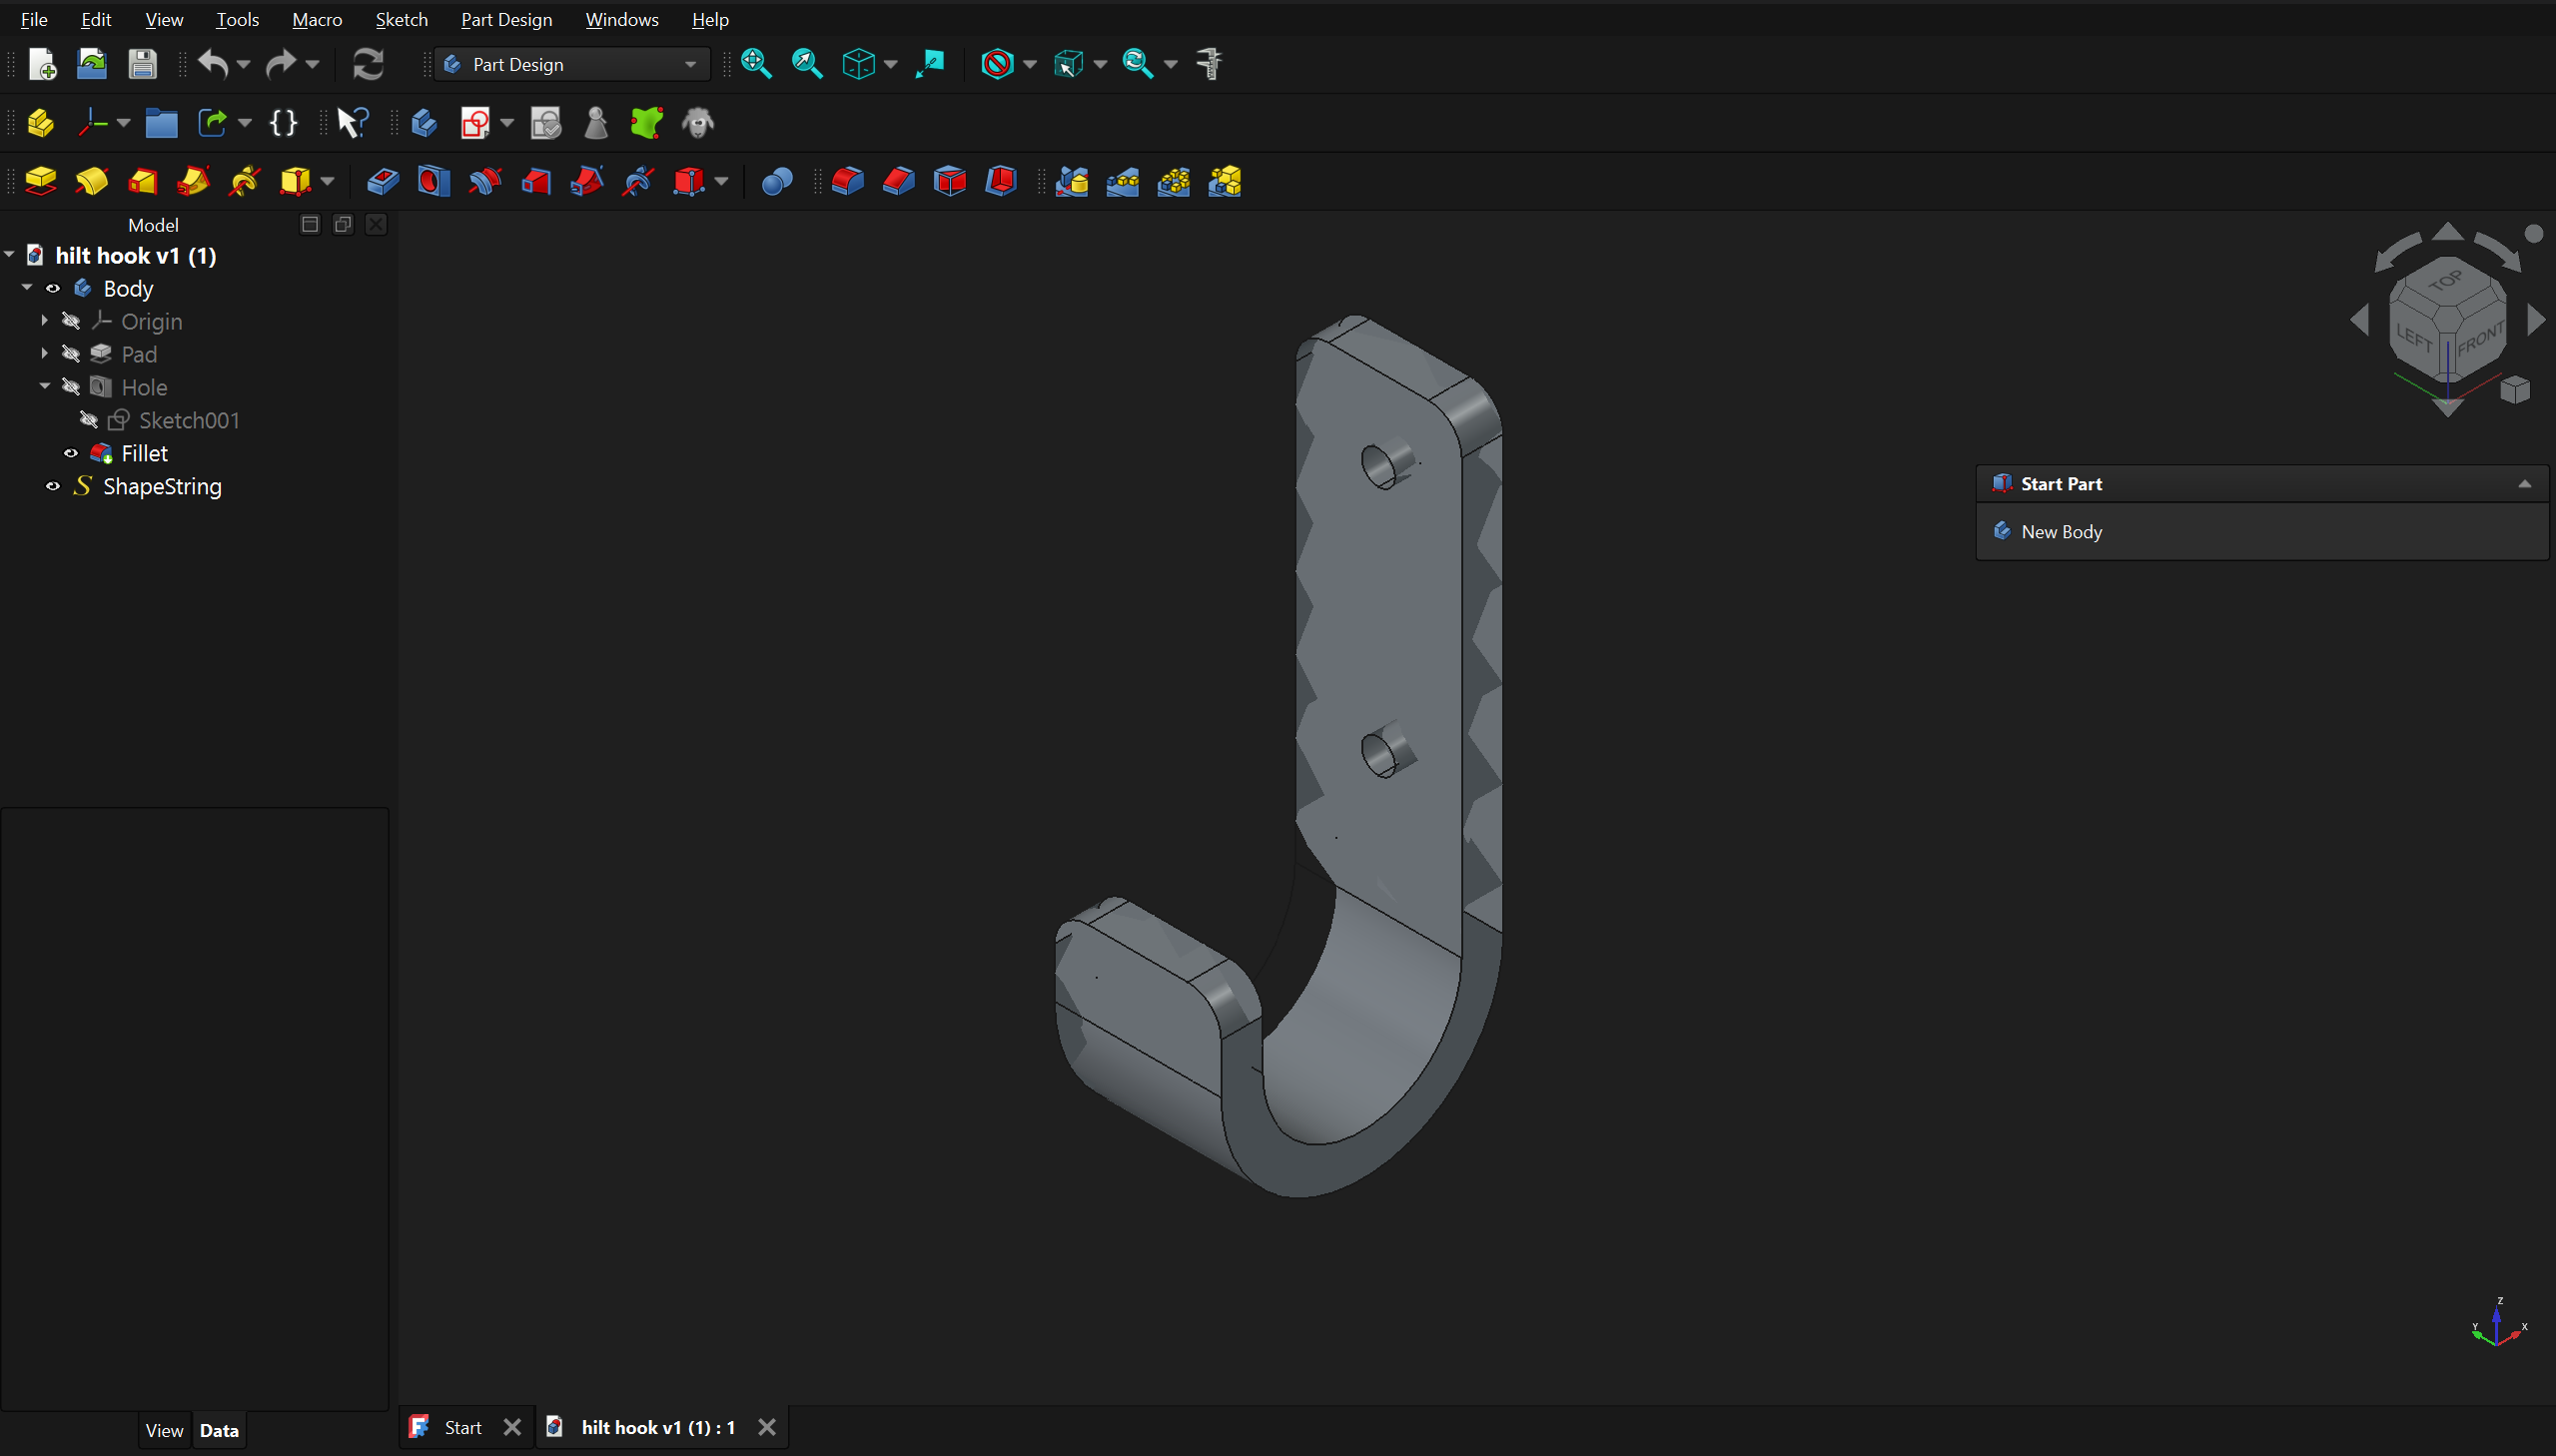
screenshot 2026 07 14 144915

Hook designed in FreeCAD, with 2 holes for wall attachment
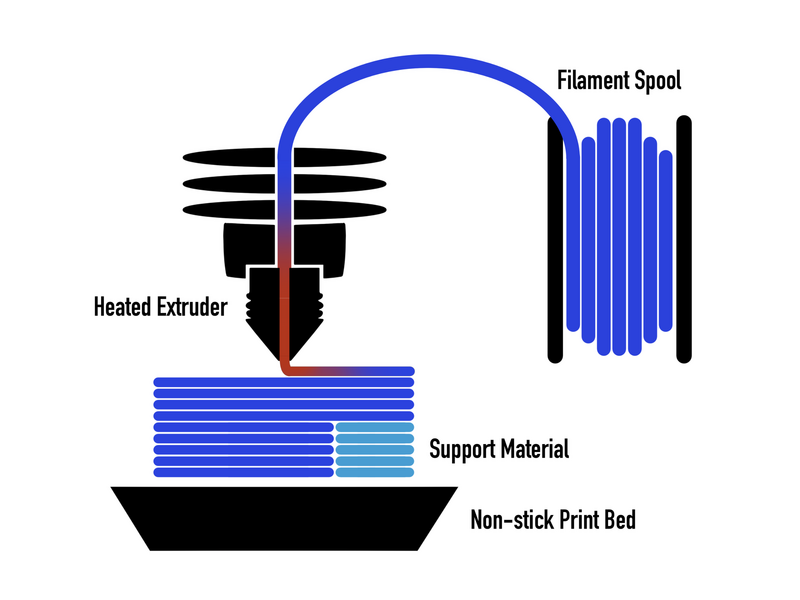
From there, we moved to 3D printing, starting first with the Bambu Studio slicing software and explaining the functions, print orientation, and other settings. Using various simple real-world examples, like Legos, I helped him determine the strongest print orientation so he could be confident explaining to my mom it would never fall on his head.

image(1)

Simplified explanation of FDM 3D printing shown to my brother (Global3D)
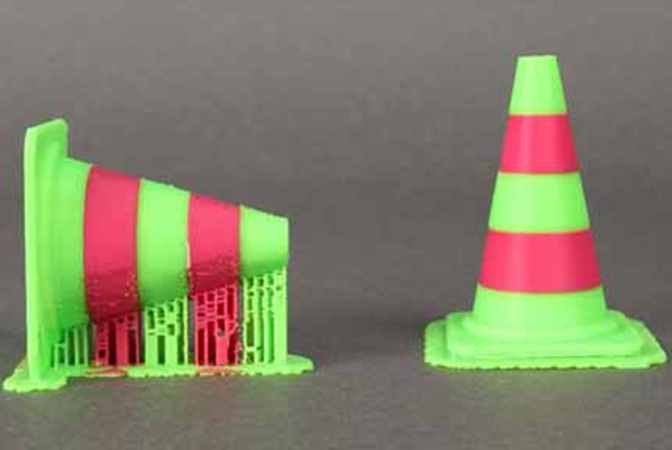
image(3)

Print orientation variations with support and brim side effects, shown to my brother (CEED Wiki)
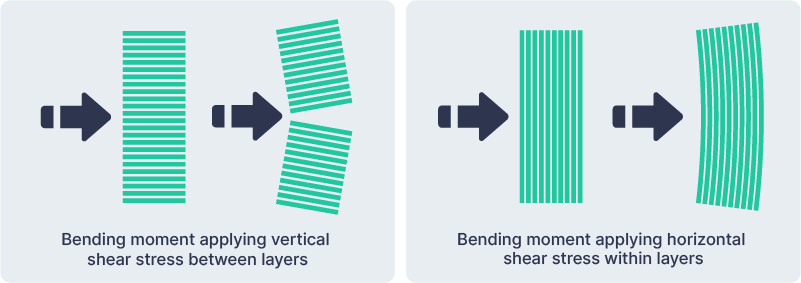
image(2)

Simplified strength benefits and weaknesses of print orientation, shown to my brother (Protolabs)
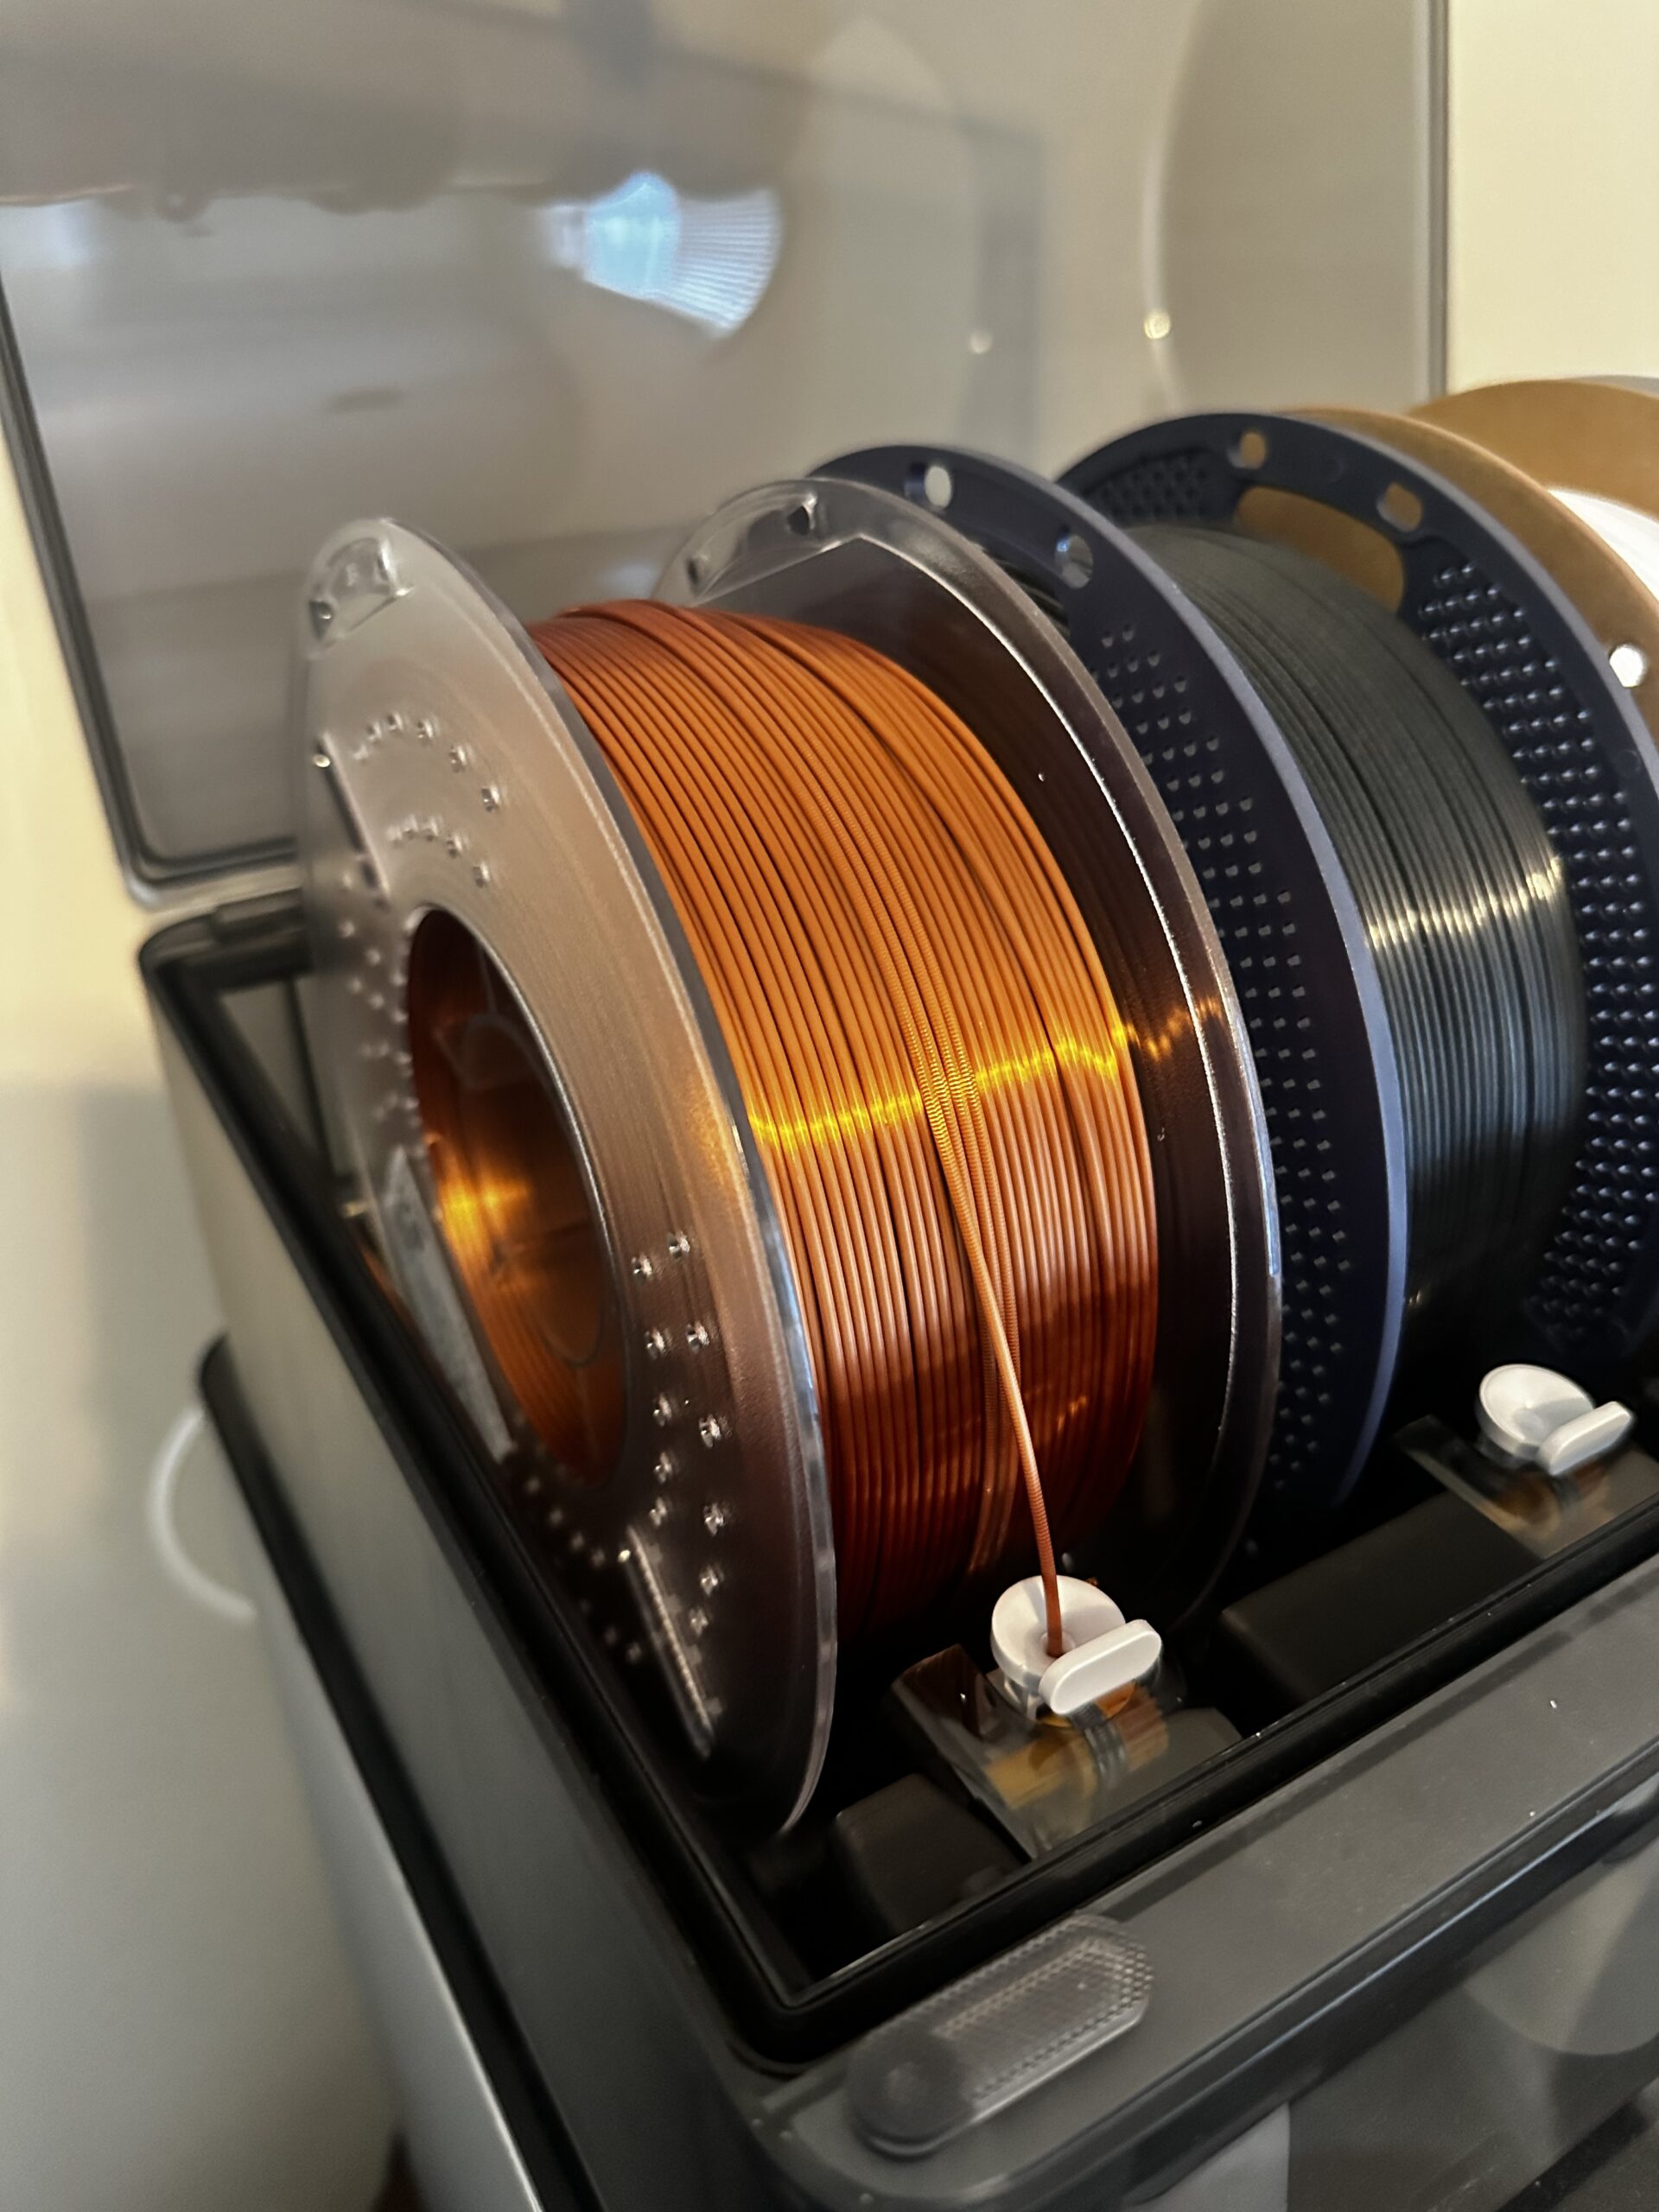
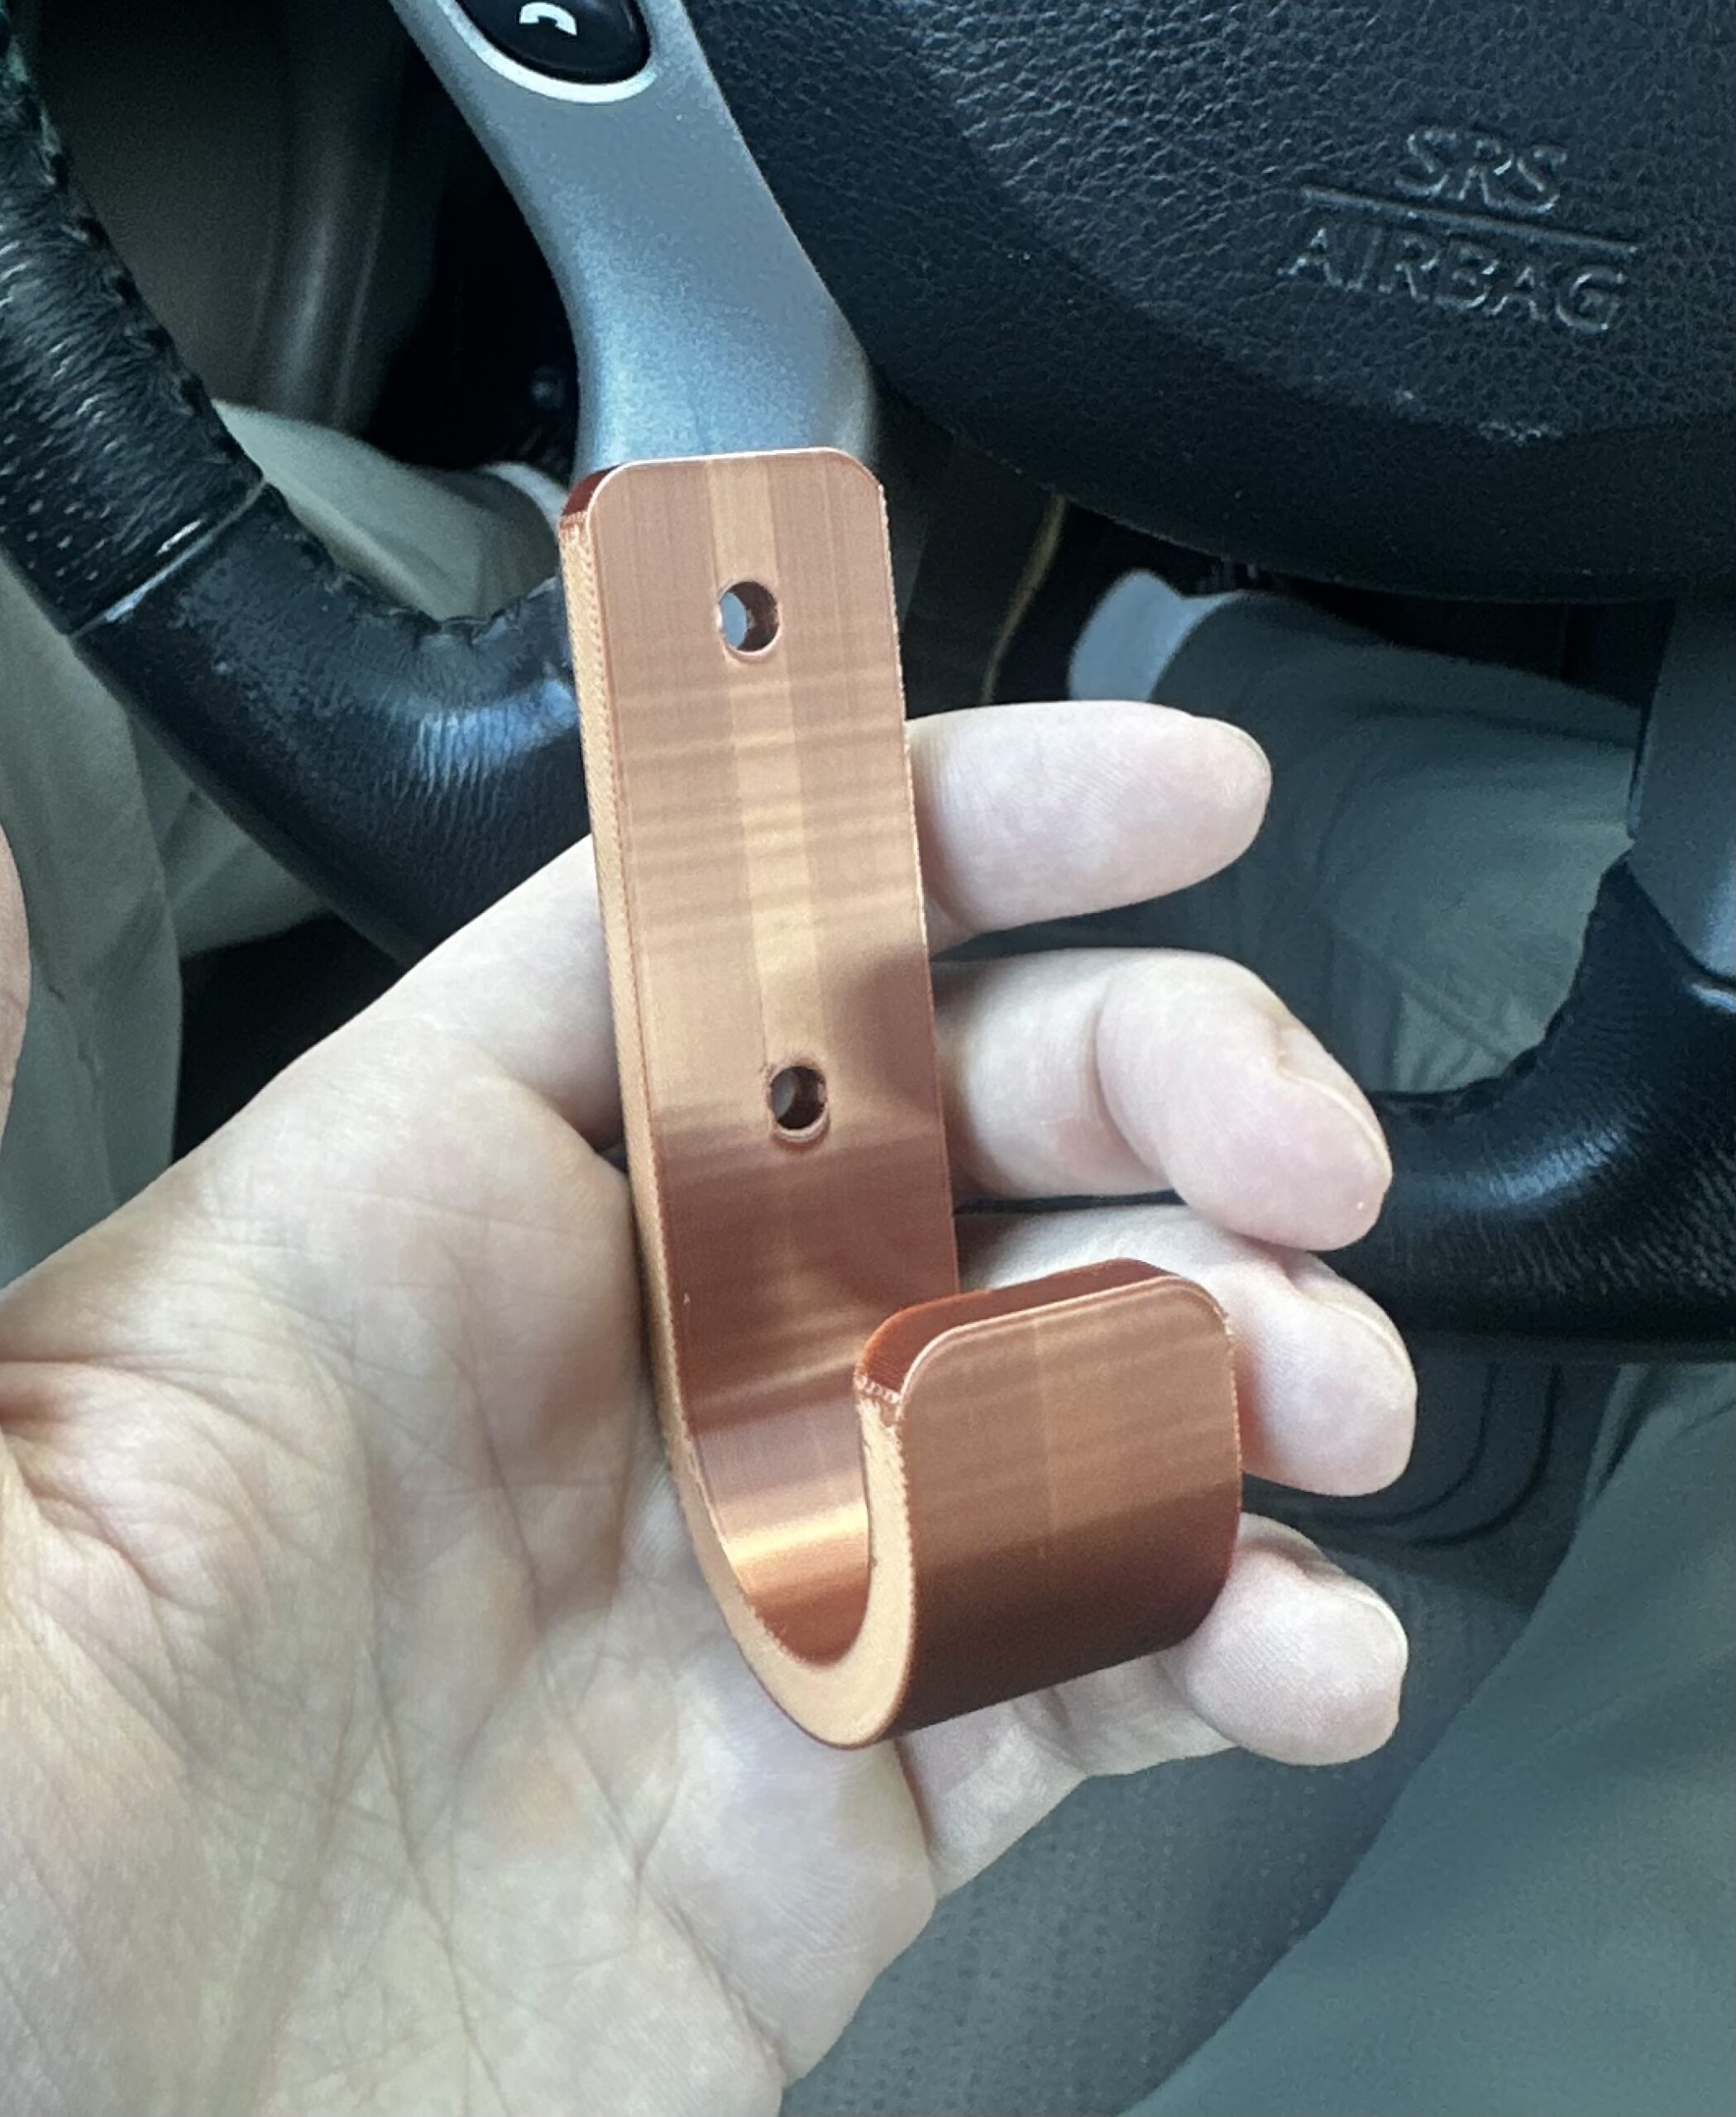
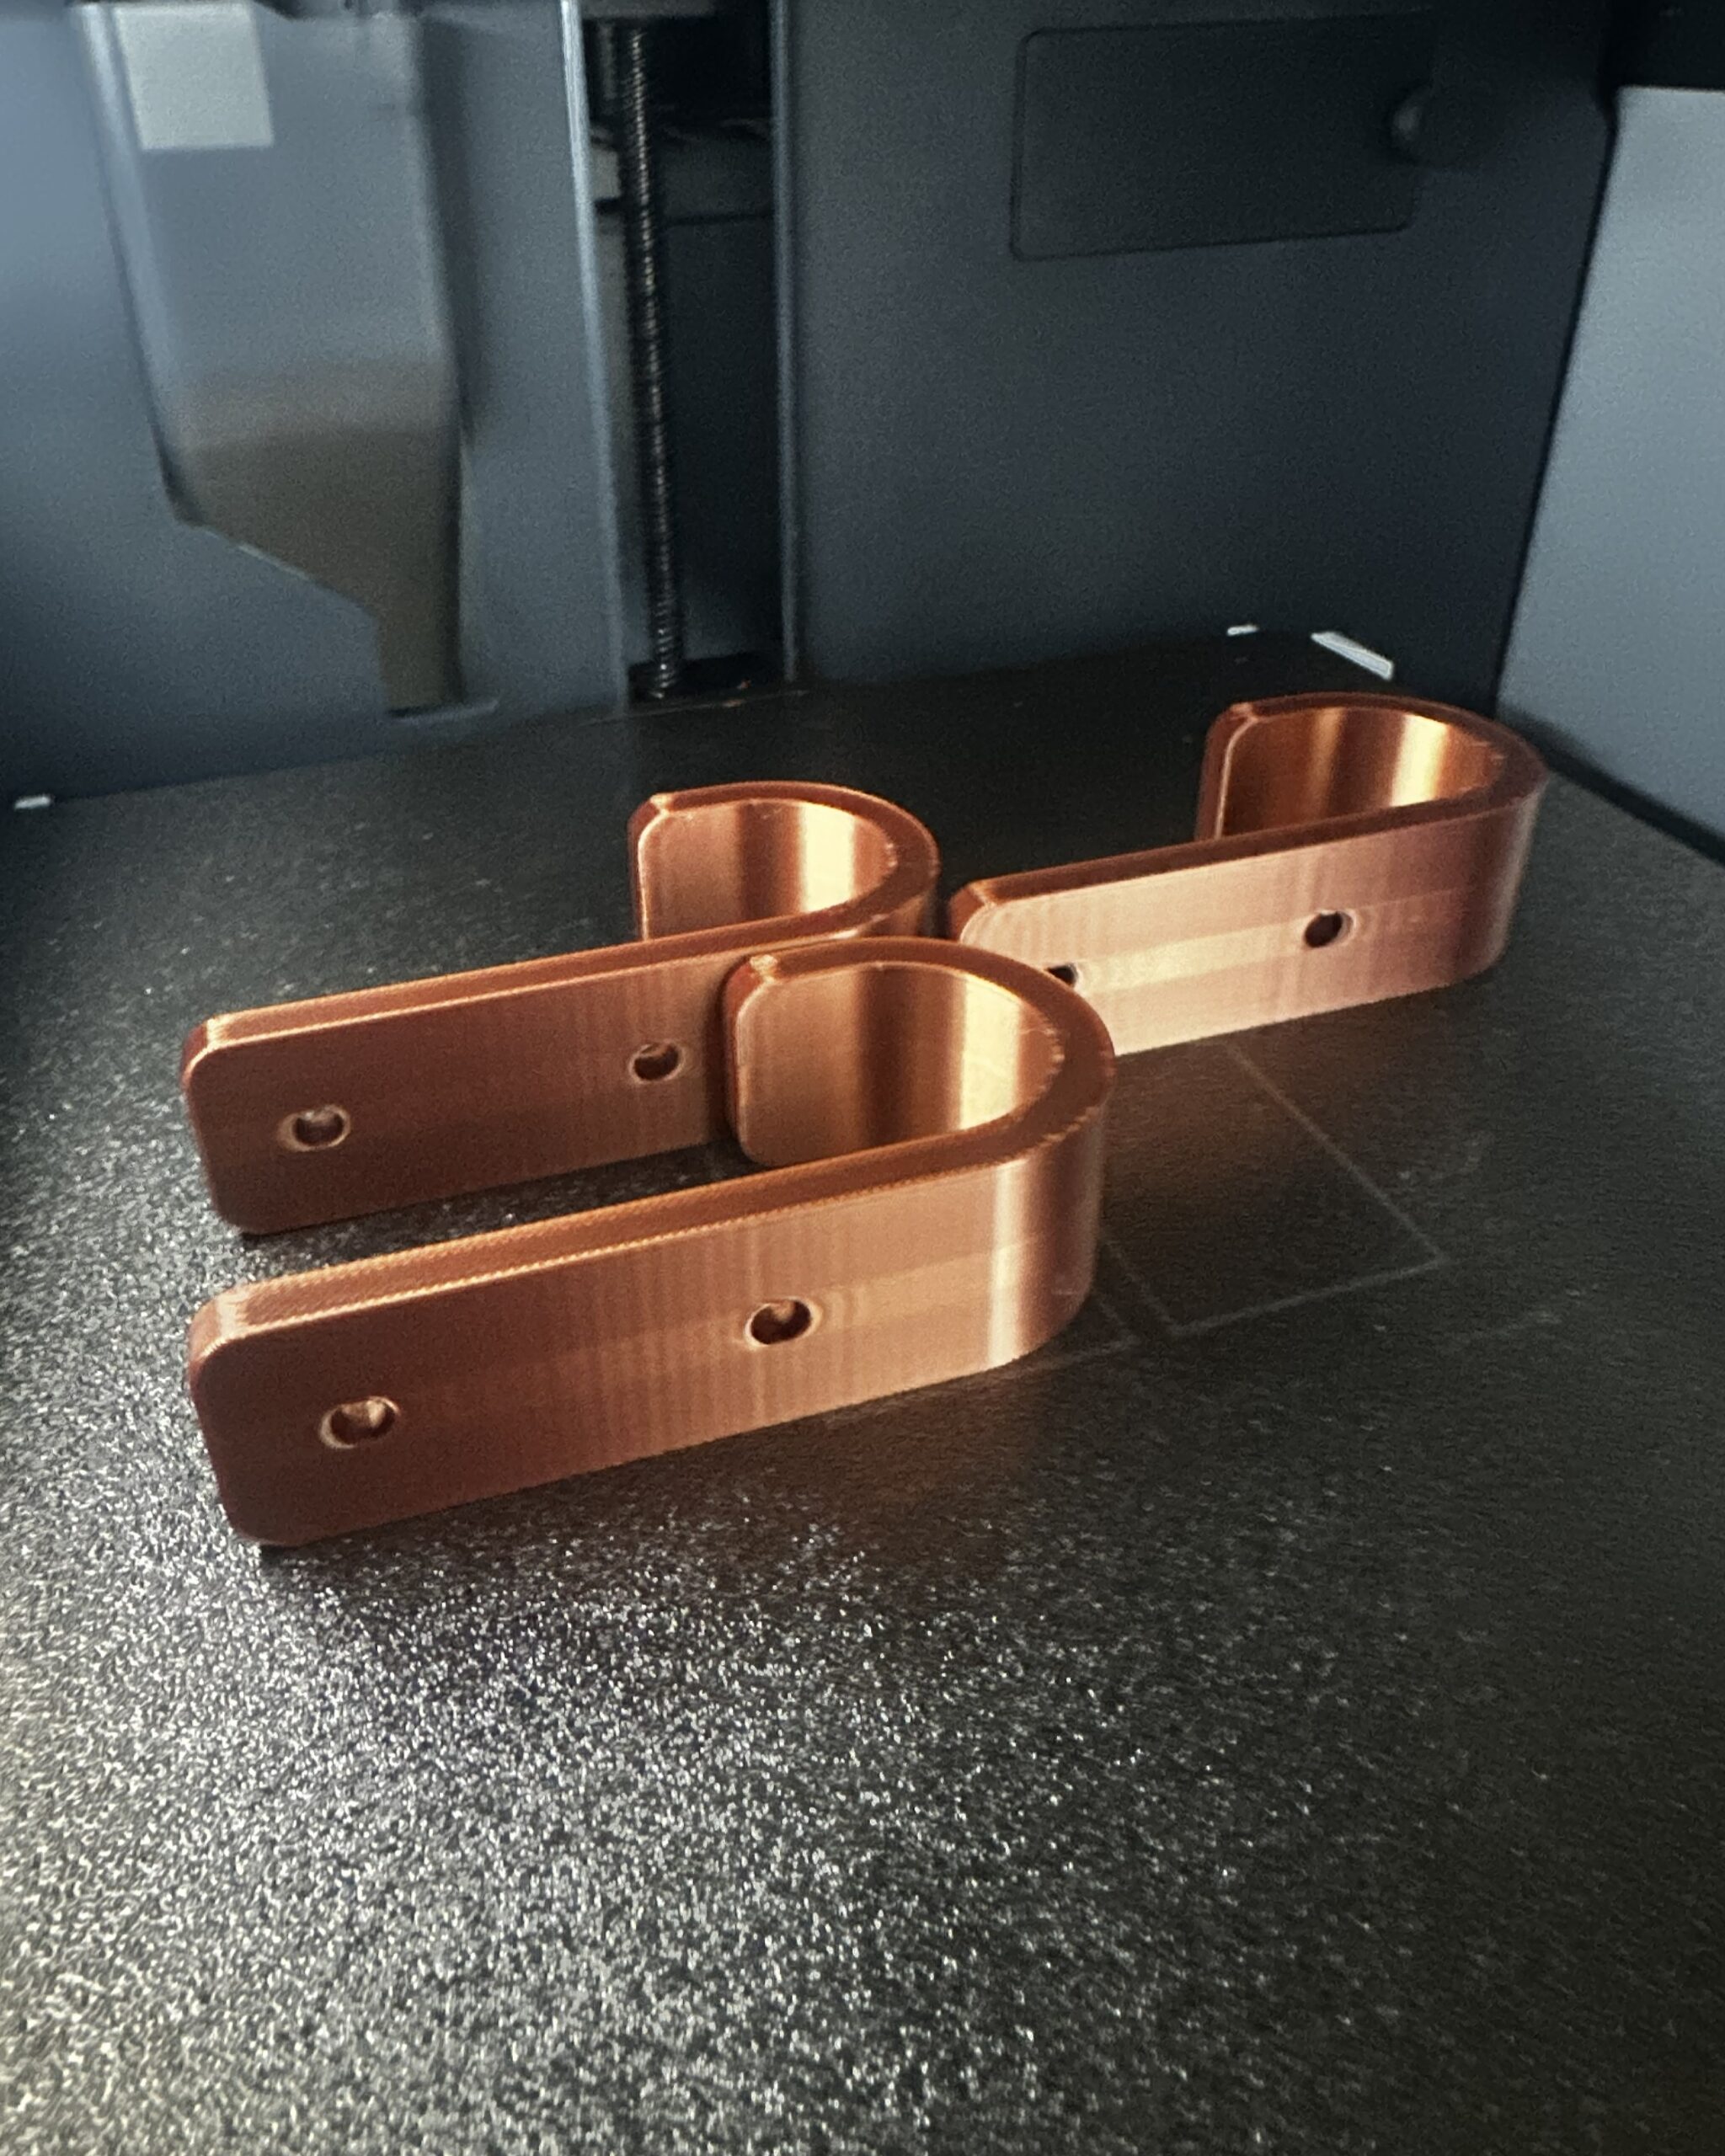
For the fun part, according to him, he got to choose the filament. As appearance was going to be the foremost important thing in the process (besides safety), he wanted something to match the brown, medieval aesthetic, and he chose to use a bronze metallic PLA. As this was going to remain inside his room with no exposure to moisture or direct sunlight, I had no concerns in using it.

20260714 204024596 ios

Bronze Silk PLA filament chosen for hooks
From there, the print was sent, and he was able to watch his print appear before his eyes.

This project was an awesome way for me to test my knowledge about 3D printing, as well as be able to get to the bare bones of the design process and CAD to explain it to a fifth grader. Overall, I’m very proud of what my little brother accomplished; he’s excited to finally see his sword, and my mom is probably just…worried.

20260208 215315910 ios

Sword displayed in my brother's room using custom hooks
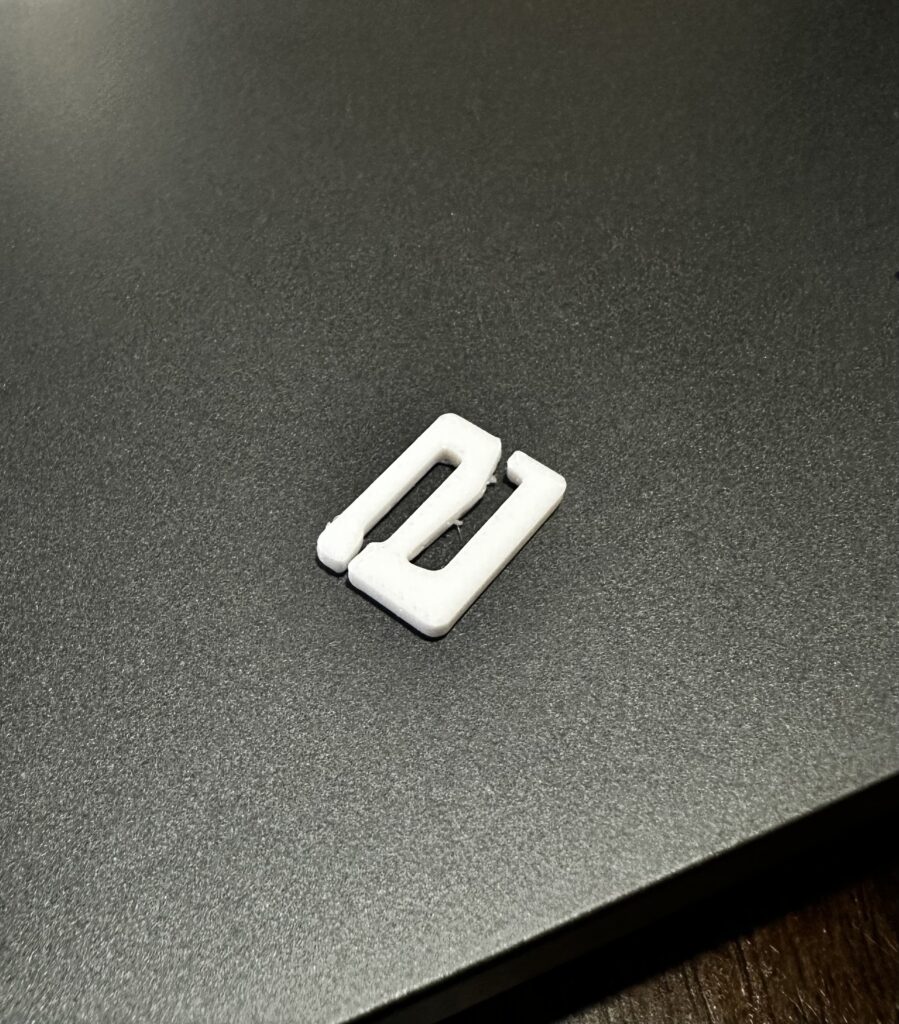
Dress Clip

img 2778

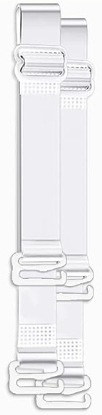
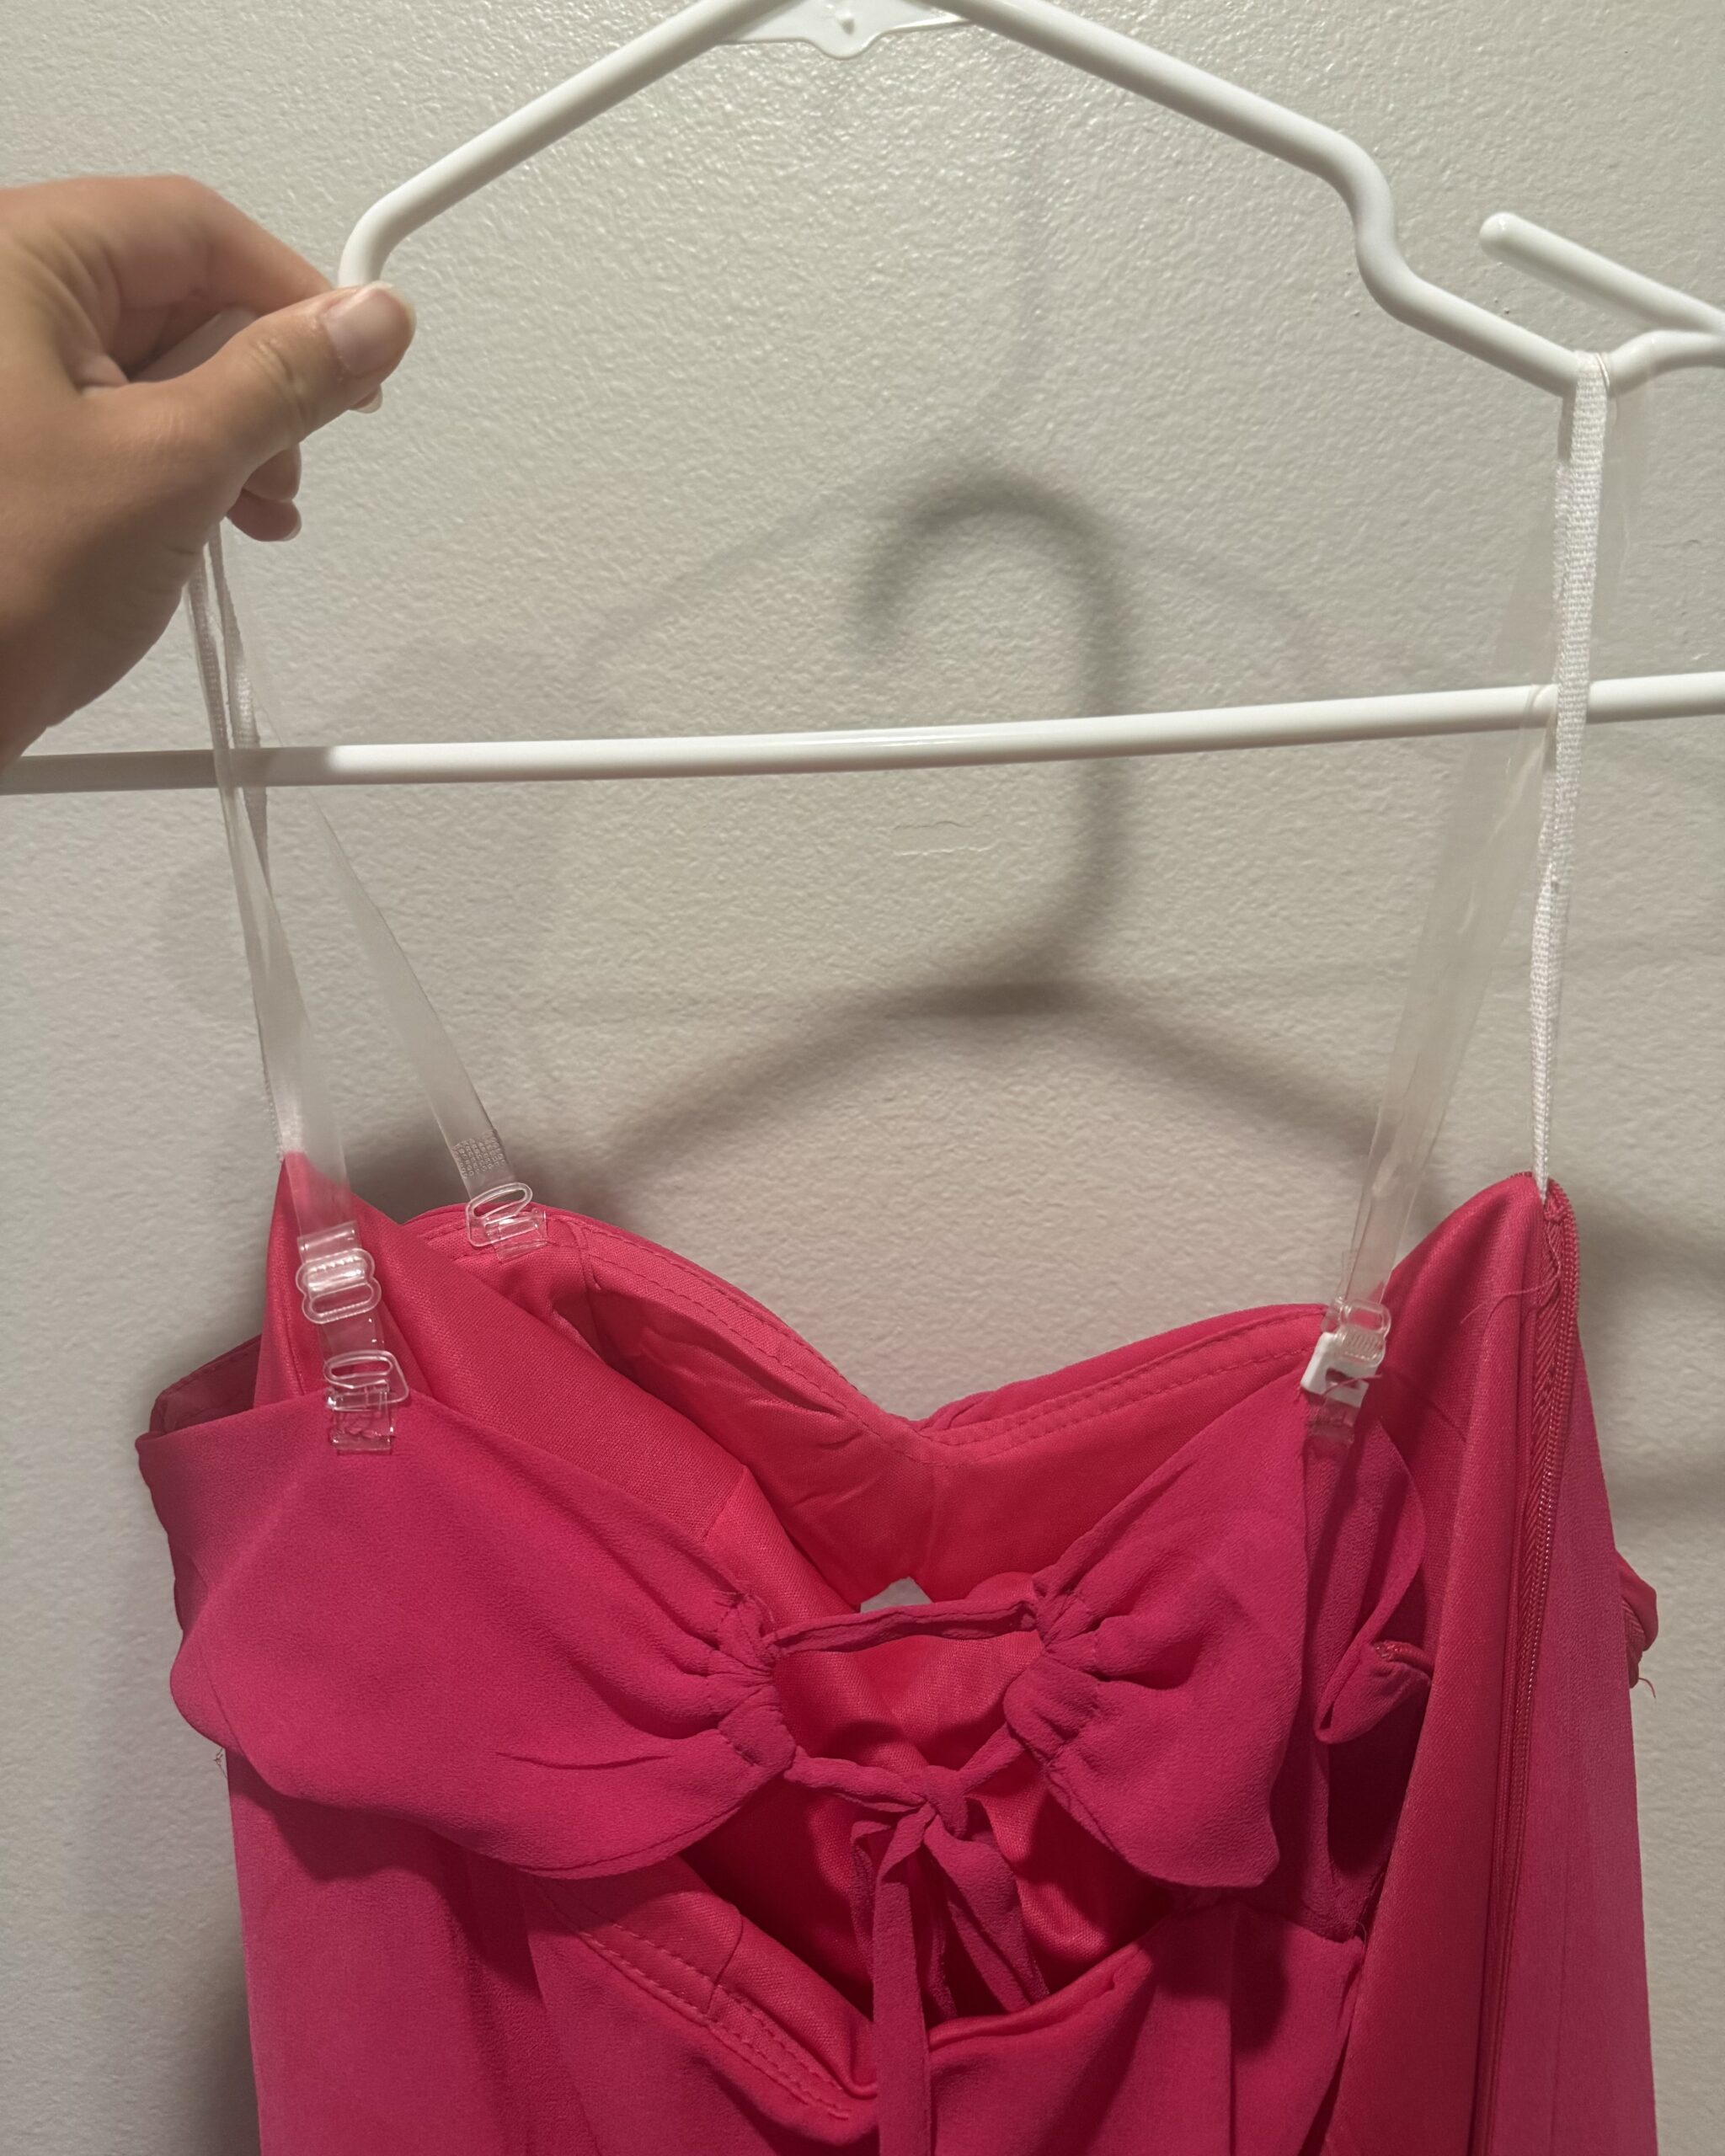
For an outing one of my friends was going to, she decided to order a new dress. Upon arrival, she loved how it fit and appreciated the clear shoulder straps included with the dress. However, there was one problem: the package was missing a s-clip that was needed for the strap assembly.

dress straps

Strap assembly from the dress, with the missing s-clip seen at the ends of the strap (Amazon)
Given that the time to return the dress before the event was too short, I suggested replacing the s-clip with a copied 3D printed version.

The process was relatively simple: I took one of the clips that were included with the dress, measured it out with a pair of calipers, and recreated it in SolidWorks. If you look closely at the image, one can notice that the straps are ultrasonic welded around the clear straps. Given that the loop still existed, and that I don’t have access to a custom ultrasonic welding machine, I needed to connect the s-clip with a different method.

screenshot 2026 07 19 195907

Dot pattern from ultrasonic welding on strap

I determined that creating a tiny slit on the side so the strap could slide in would be best, and then sealing off the slit with super glue would prevent the clip from sliding out. Ideally, a clear filament would have been used, but in the time crunch, white PETG was settled on with its flexible and temperature-resistant properties. I did make my clip slightly thicker than the OEM molded ones to add some additional layer lines and hopefully increase the overall strength.

dress clip render

SolidWorks Visualize render of dress clip, with small slit on length to insert clear strap before gluing

I sliced the file, threw it on my printer, and within an hour of her unboxing the dress, we had a new clip. Somehow, I got lucky, and everything worked according to plan the first time. The loop fit right through the slit; gluing was a breeze, and the clip worked flawlessly.

dress clip

Clip on right side of dress

Personalized Trash Cans

personalized trash cans

Another project that stemmed from a previous relationship came from when we would hang out at her apartment. She lacked a small trash can in her room, and getting up to go to the kitchen got annoying fast.

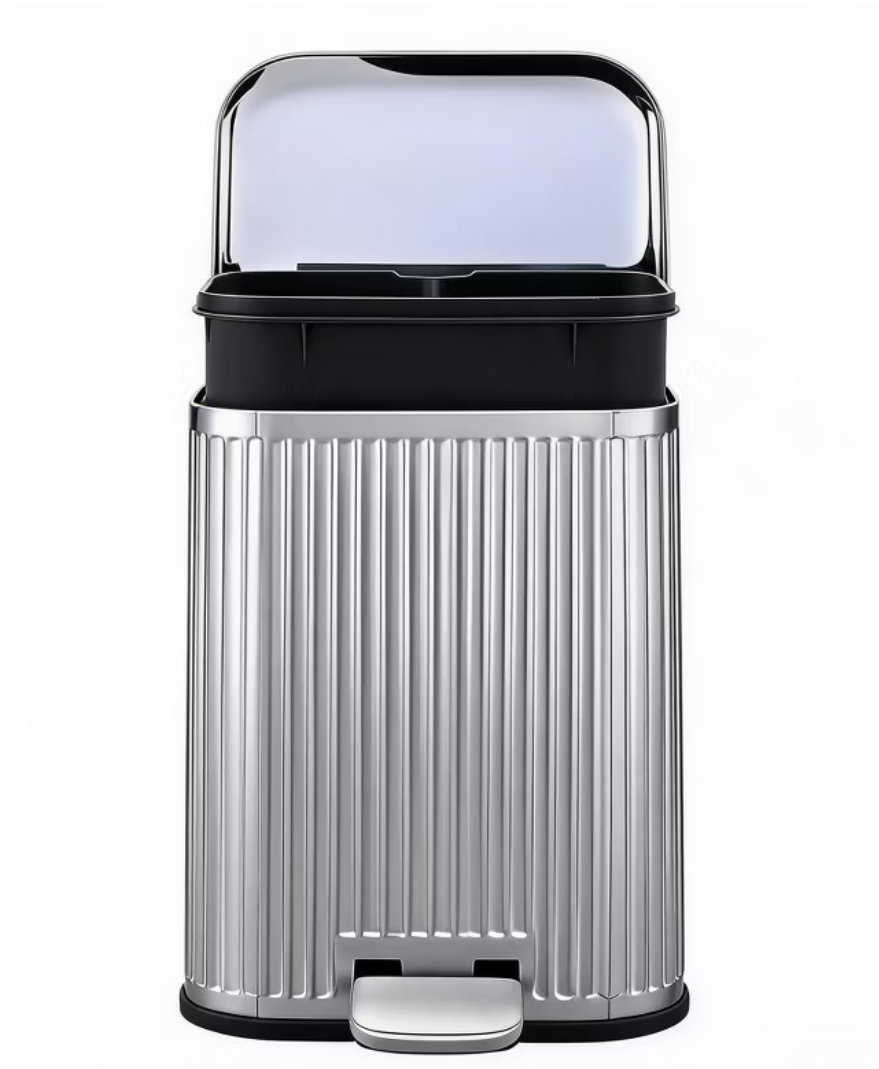
Either way, I saw it as an opportunity to print something better than what you could buy. I noticed a lot of the trash cans readily accessible at name brand stores were either pedal-operated bathroom lid cans, or simply a can. The foot pedal ones were nice as most of them had an interior sleeve, allowing the user to take a grocery bag and tuck it into the edge, and when slid back down, could hide and hold the bag. In a bedroom setting, though, the pedal activation is annoying if you are lying in bed or not directly next to the can, and not the most aesthetically pleasing.

screenshot 2026 07 19 202344

Foot pedal bathroom trash can, with interior sleeve displayed in black (Target)
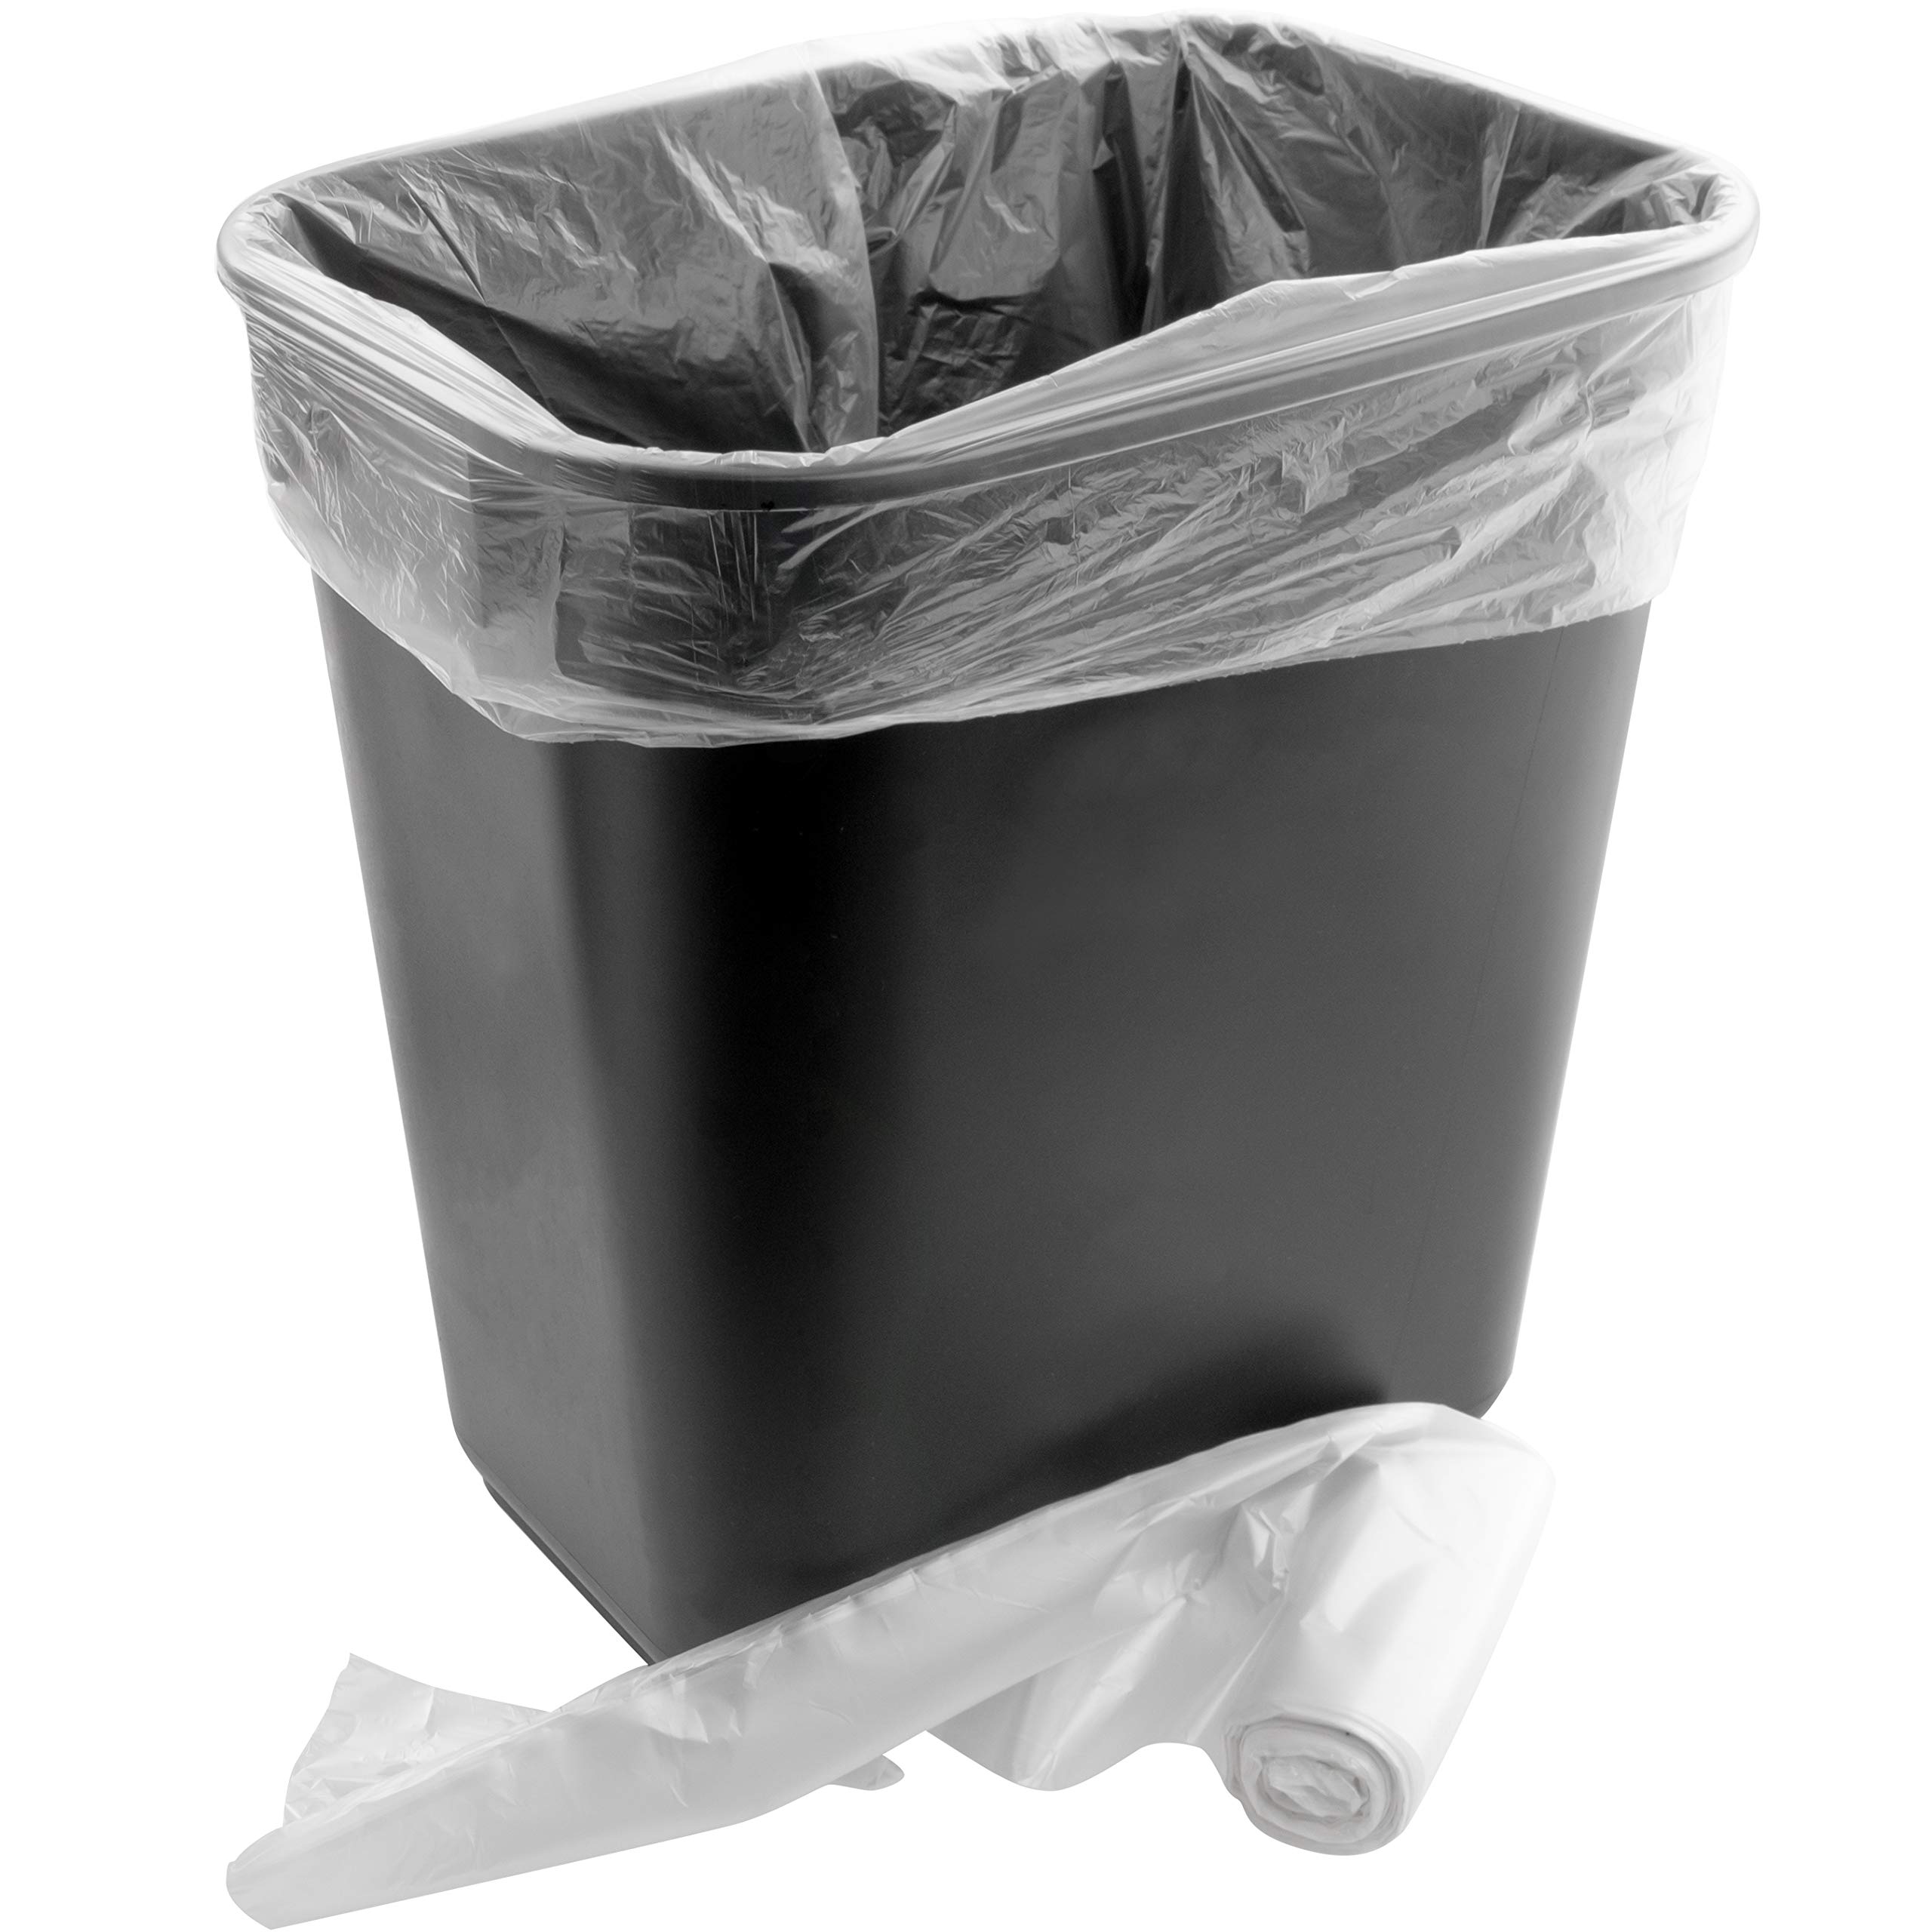
On the flip side, the cylindrical cans were very accessible from pretty much any point in the room, especially if you’re a good free-throw shooter like I am. However, the bag services these cans provide are limited. However, tying the bag externally around the lid is not visually appealing, and if you opt for no bag, the can has no protection from gum or other substances from dirtying up the inside rather quickly.

version 1.0.0

Desk/personal trash can, with plastic bag tied around rim (Amazon)
With both designs in mind, I wanted to combine the two and create a can that could seamlessly hold a grocery bag for waste, without compromising the seamless aesthetic a pedal/bagless can could. As most people collect more grocery bags than they probably want, finding a use for them outside of being trashed (no pun intended) or in the ocean would be great.

To hold the bag, some kind of force was needed to prevent it from falling in on itself. Most people unglamorously tie the bag to have a smaller perimeter than the lid/apply a compressive force to the outer wall, which results in friction holding the bag. However, to avoid the added complication of tying the bag, I used the same principle the inner shell did for the pedal cans and utilized an interference fit to induce the friction needed to hold the bag.

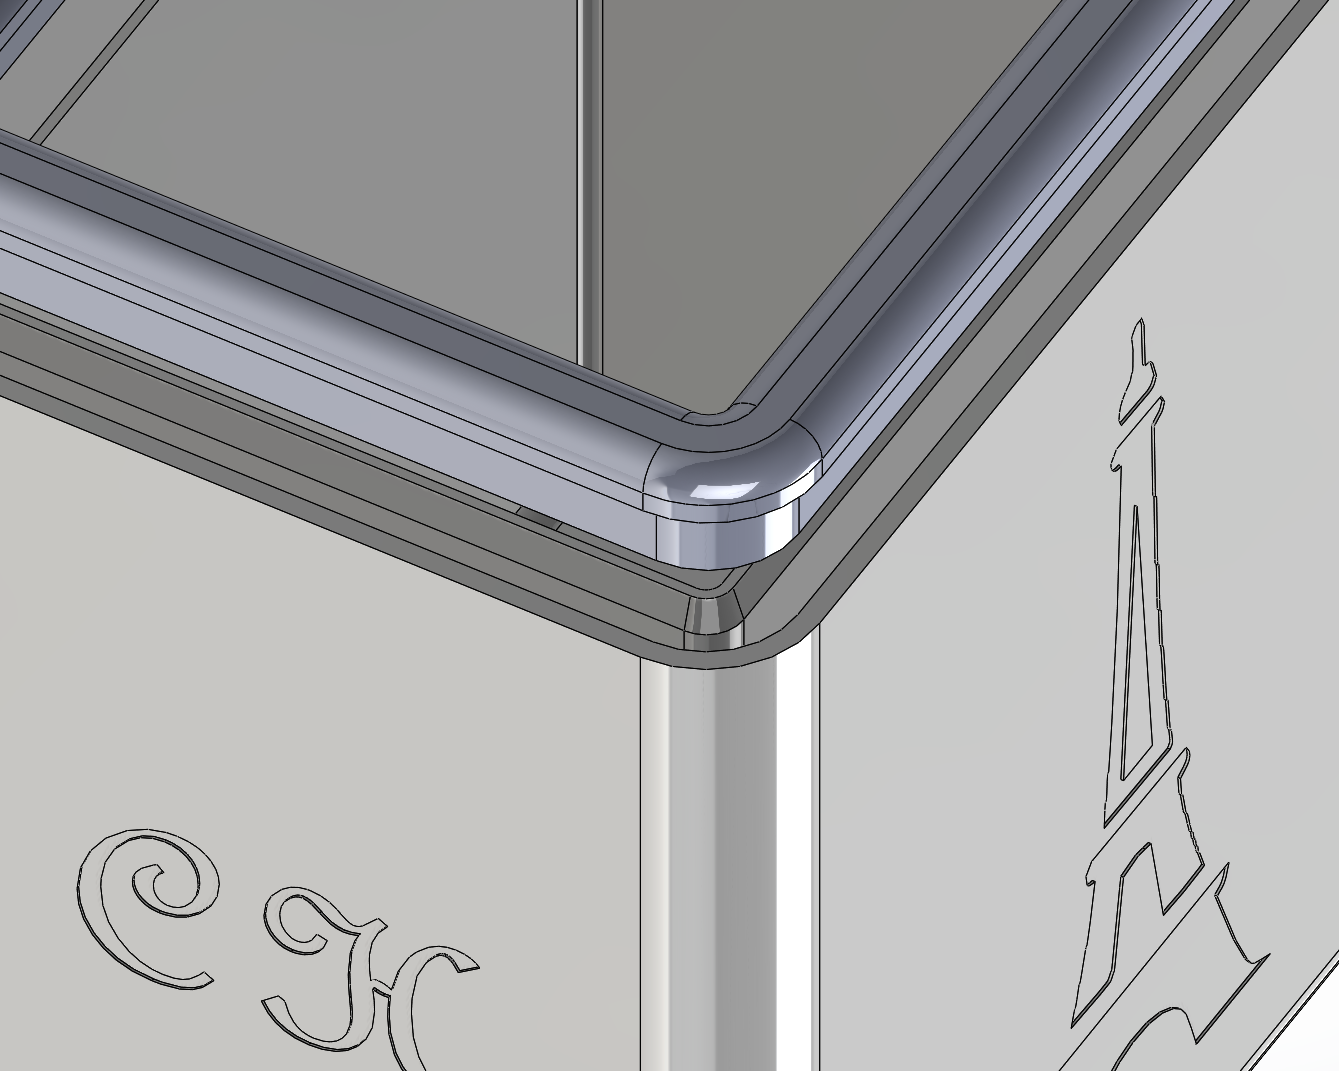
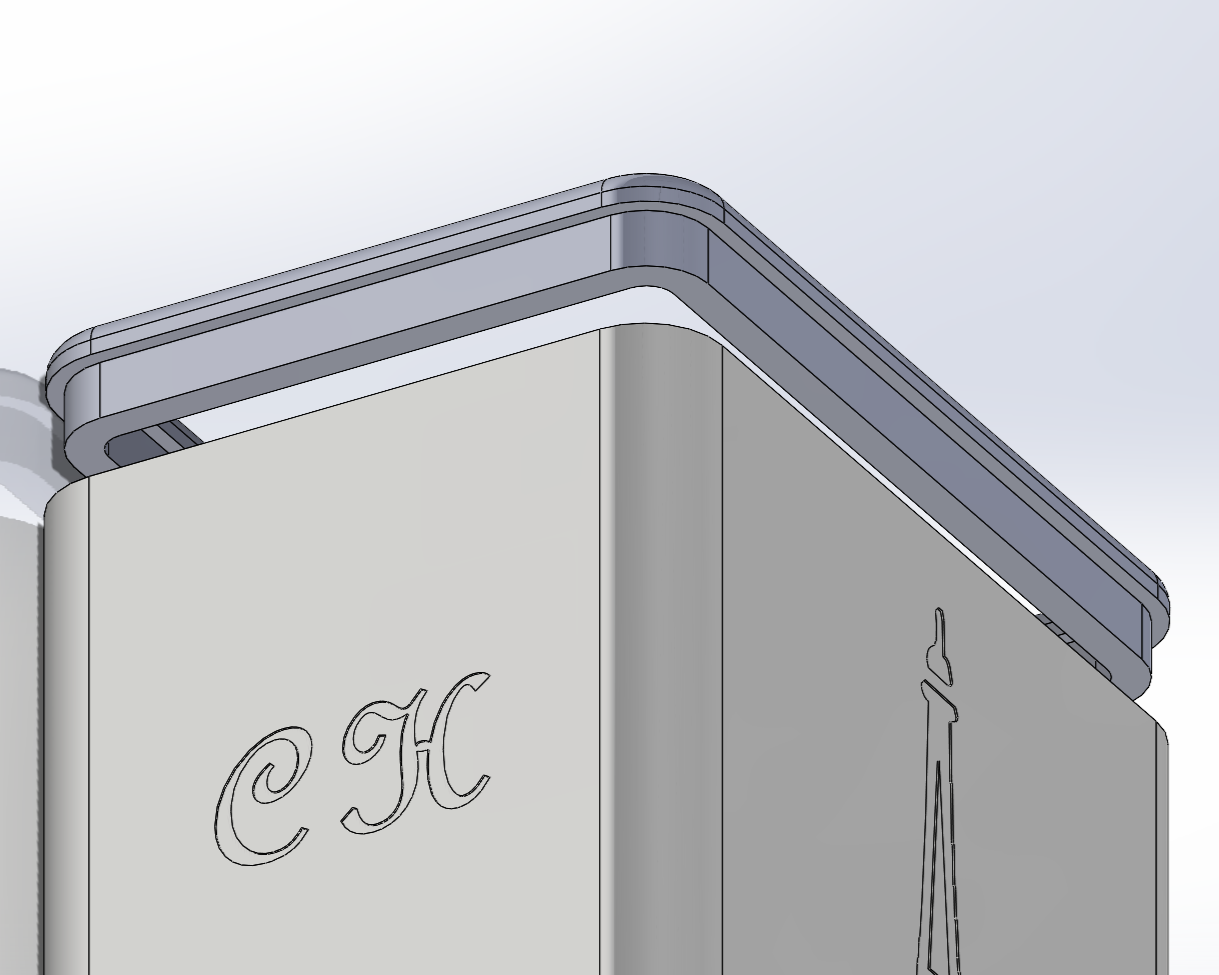
My design came together as a two-piece assembly: a lid with a small, center-aligned extrusion, and a base can with a channel. The assembly works by having the user take a grocery bag, tucking the edges into the channel slightly, and then letting the center-aligned extrusion push and hold the bag as it is inserted. I found this design to be intuitive, as it eliminated the need for annoying bag tying or any finessing of a pedal-operated can.

Finalized first version of trash can lid, showing the extrusion serving as the pinch system in the can channel

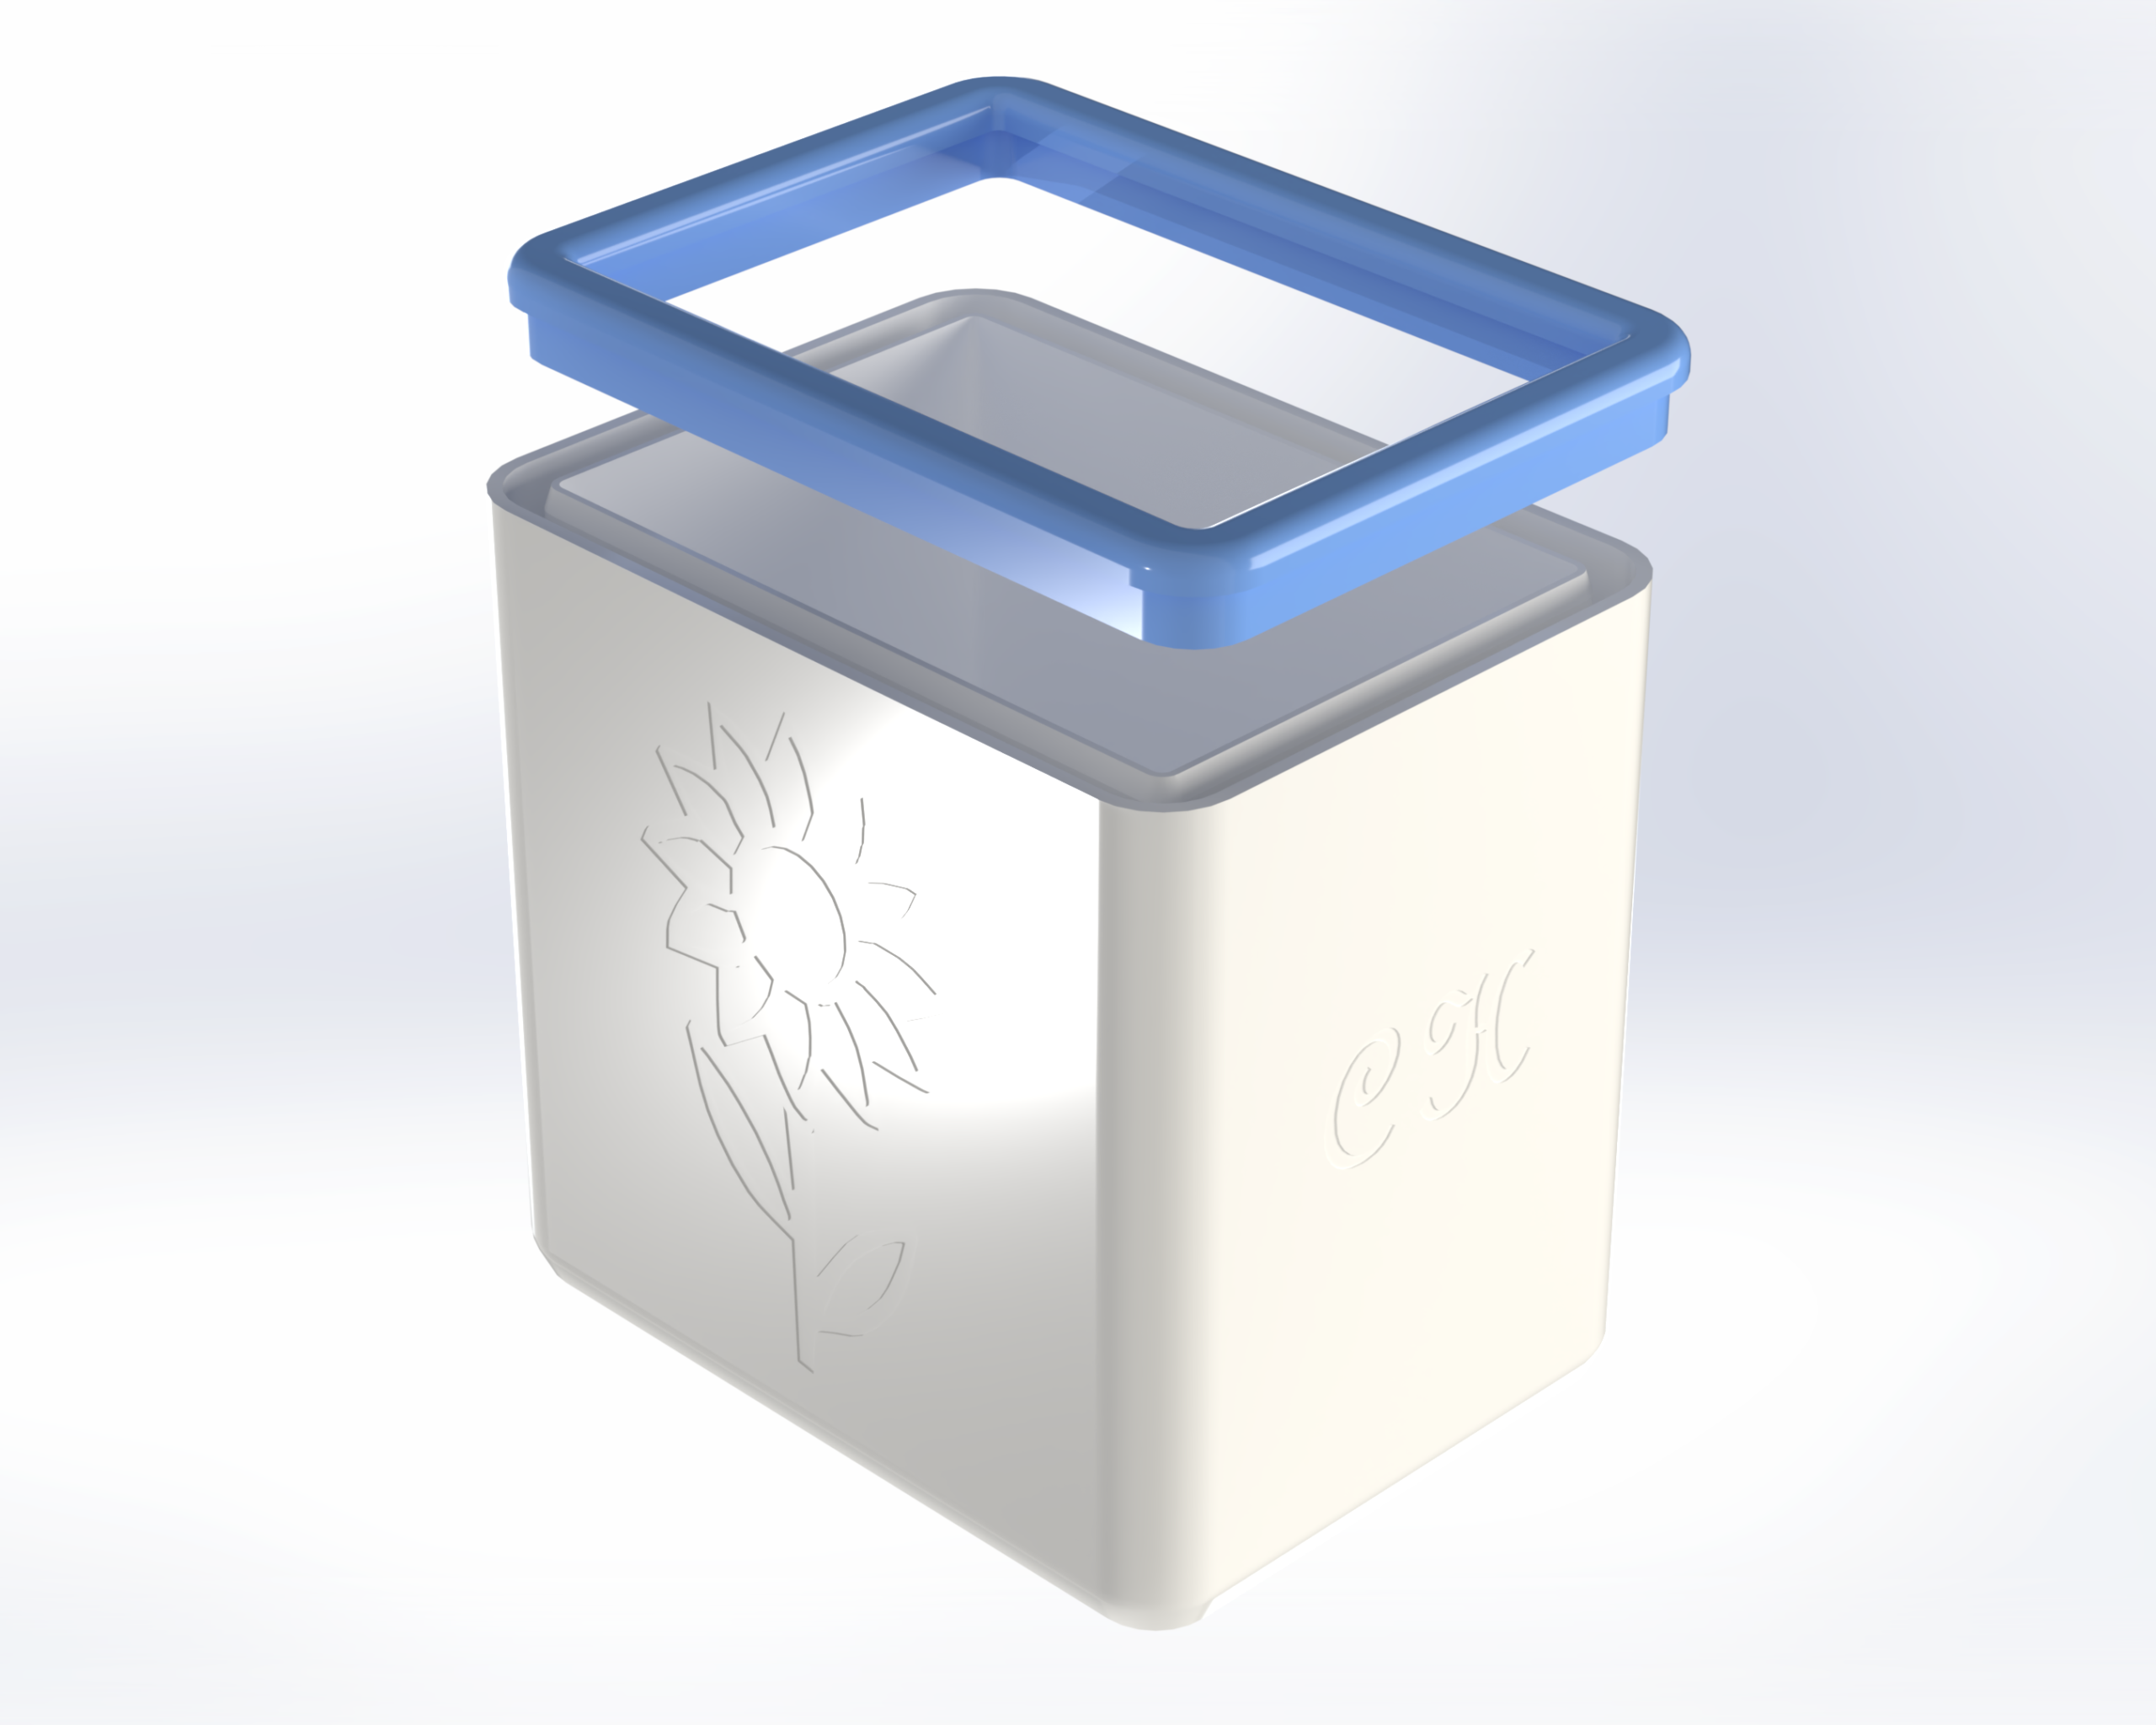
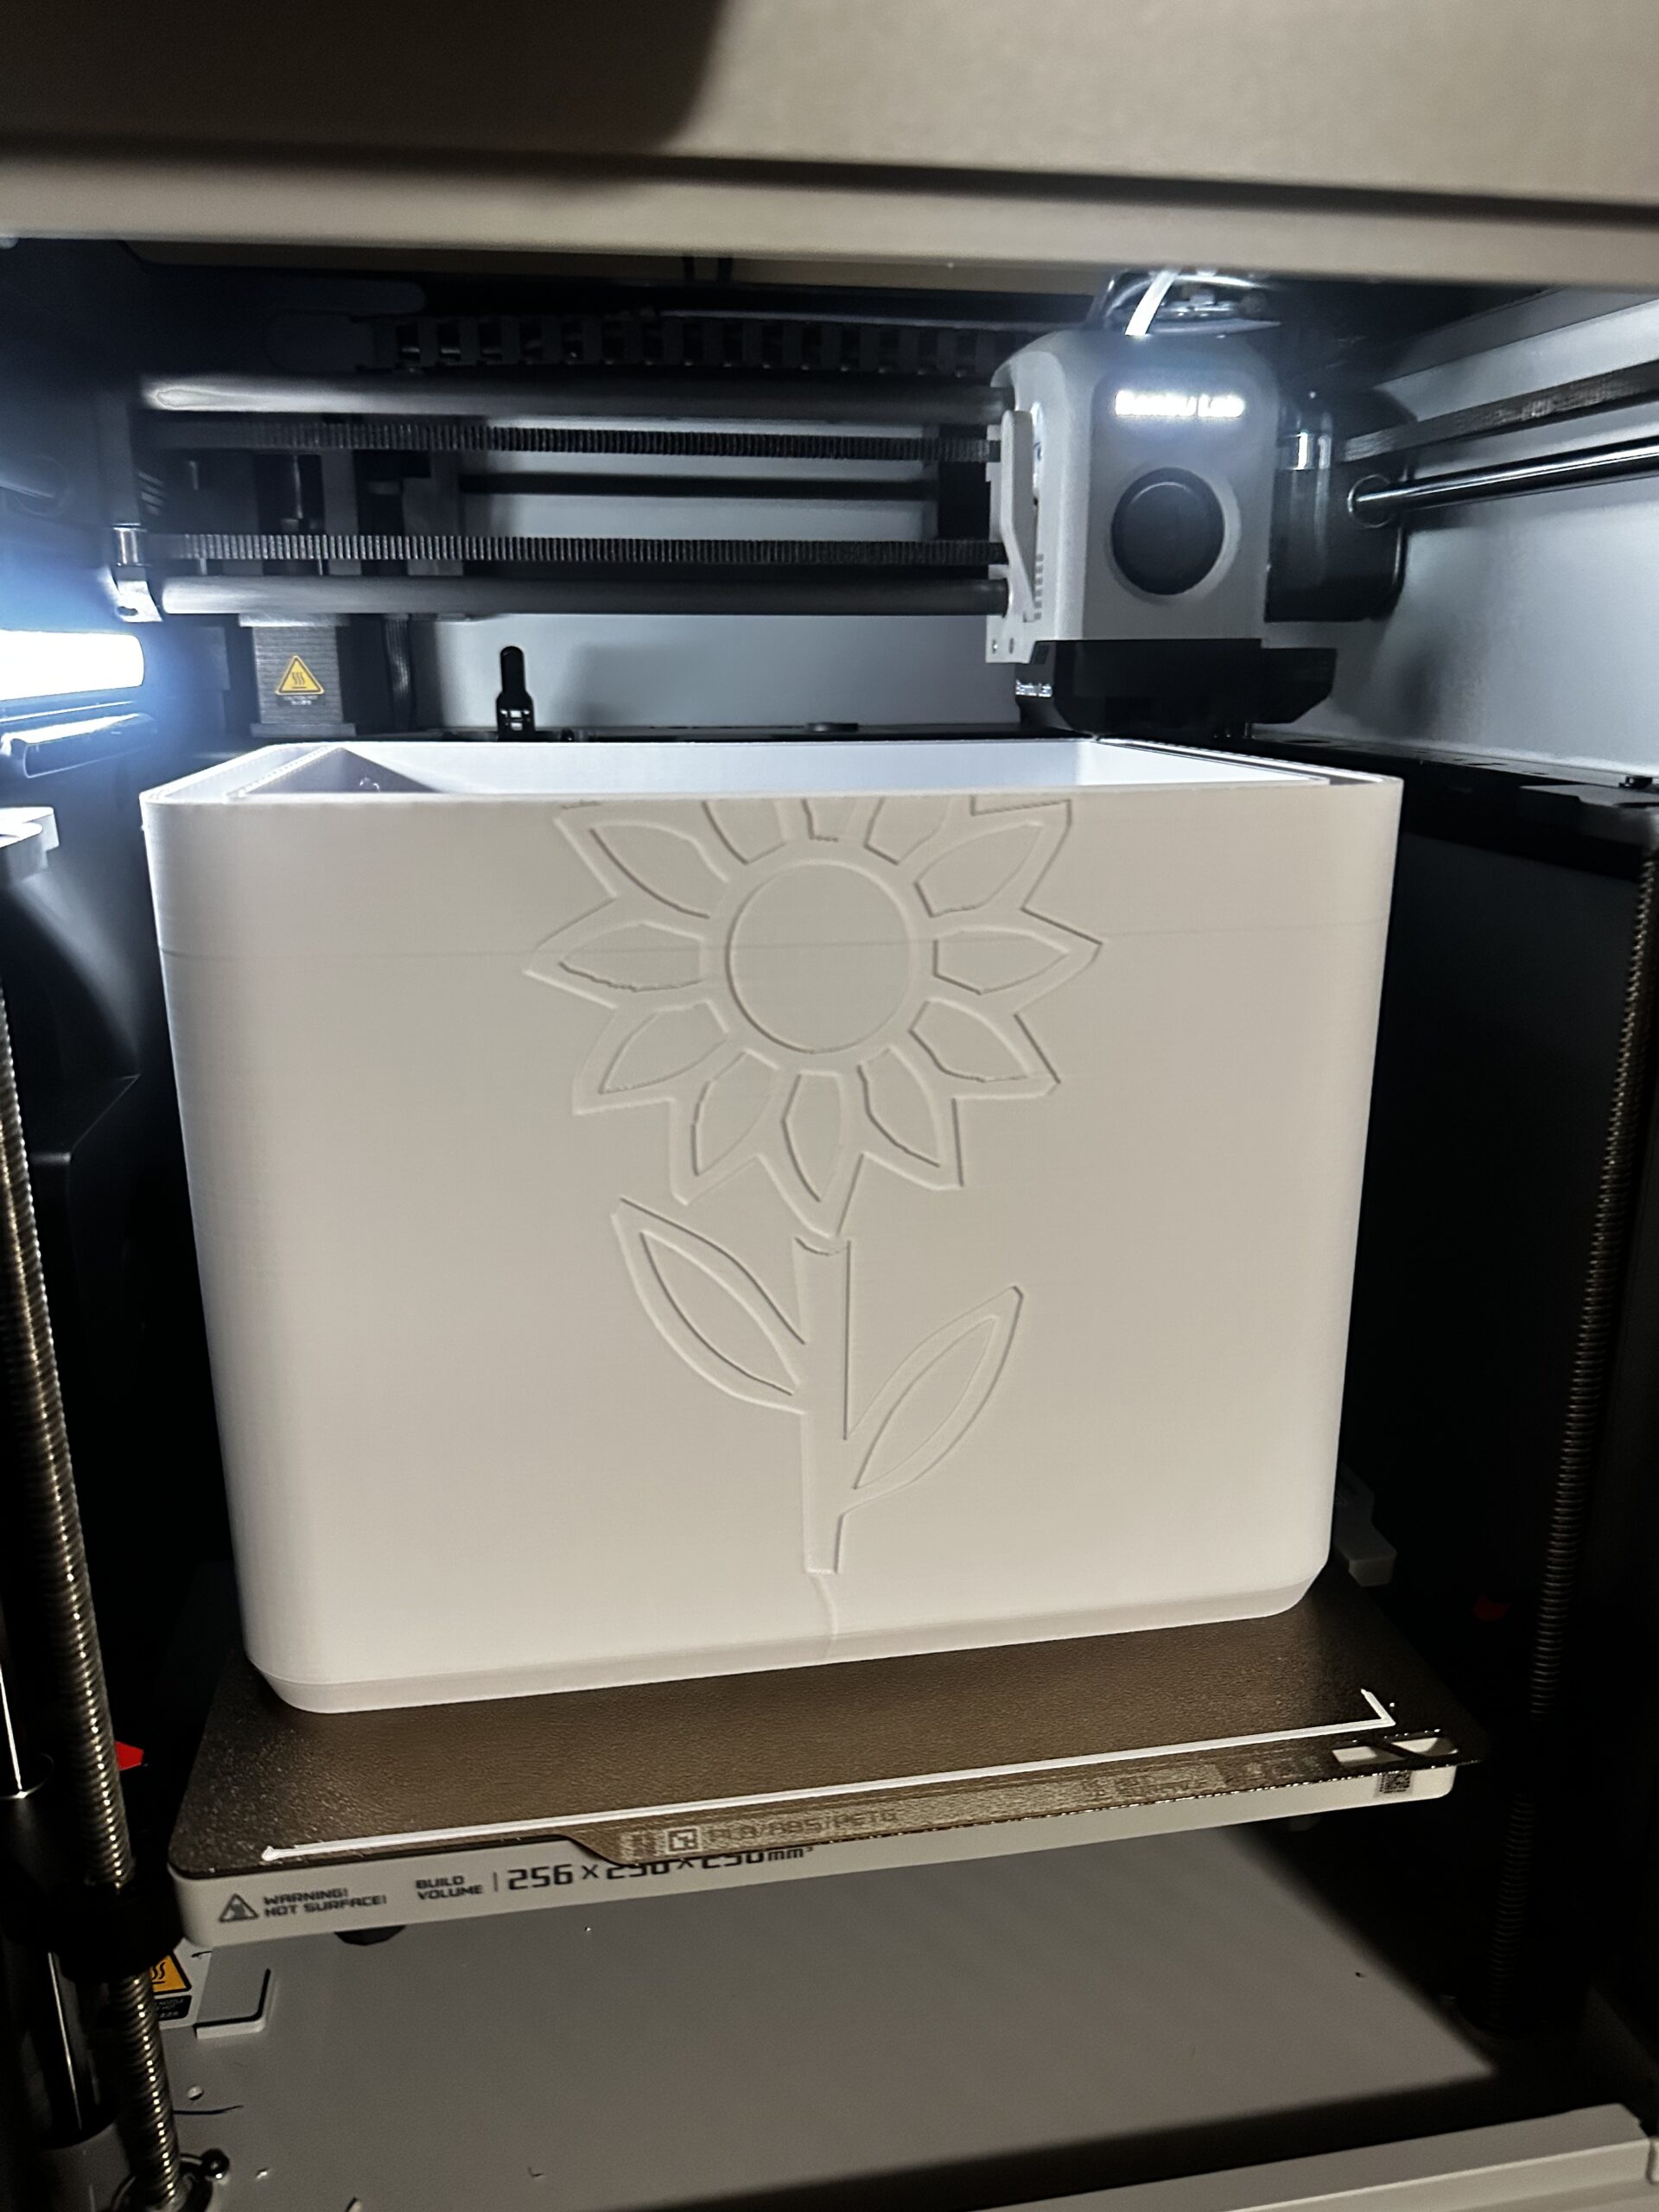
Manufacturing came in the form of FDM 3D printing. To avoid supports, the lid was printed in two pieces and then glued together, although supports could be used if glue was not available. White PETG was used for the base as a more temperature-resistant and durable material, while blue and silver Silk PLA was used for the lid as an added pop of color. The base was also personalized with initials and several embossed sketches.

trashcanrender

Render of first printed trash can, showing the tucking system the lid uses to restrain the bag
20251029 205712002 ios

Trash can during printing process on my Bambu Labs X1 Carbon

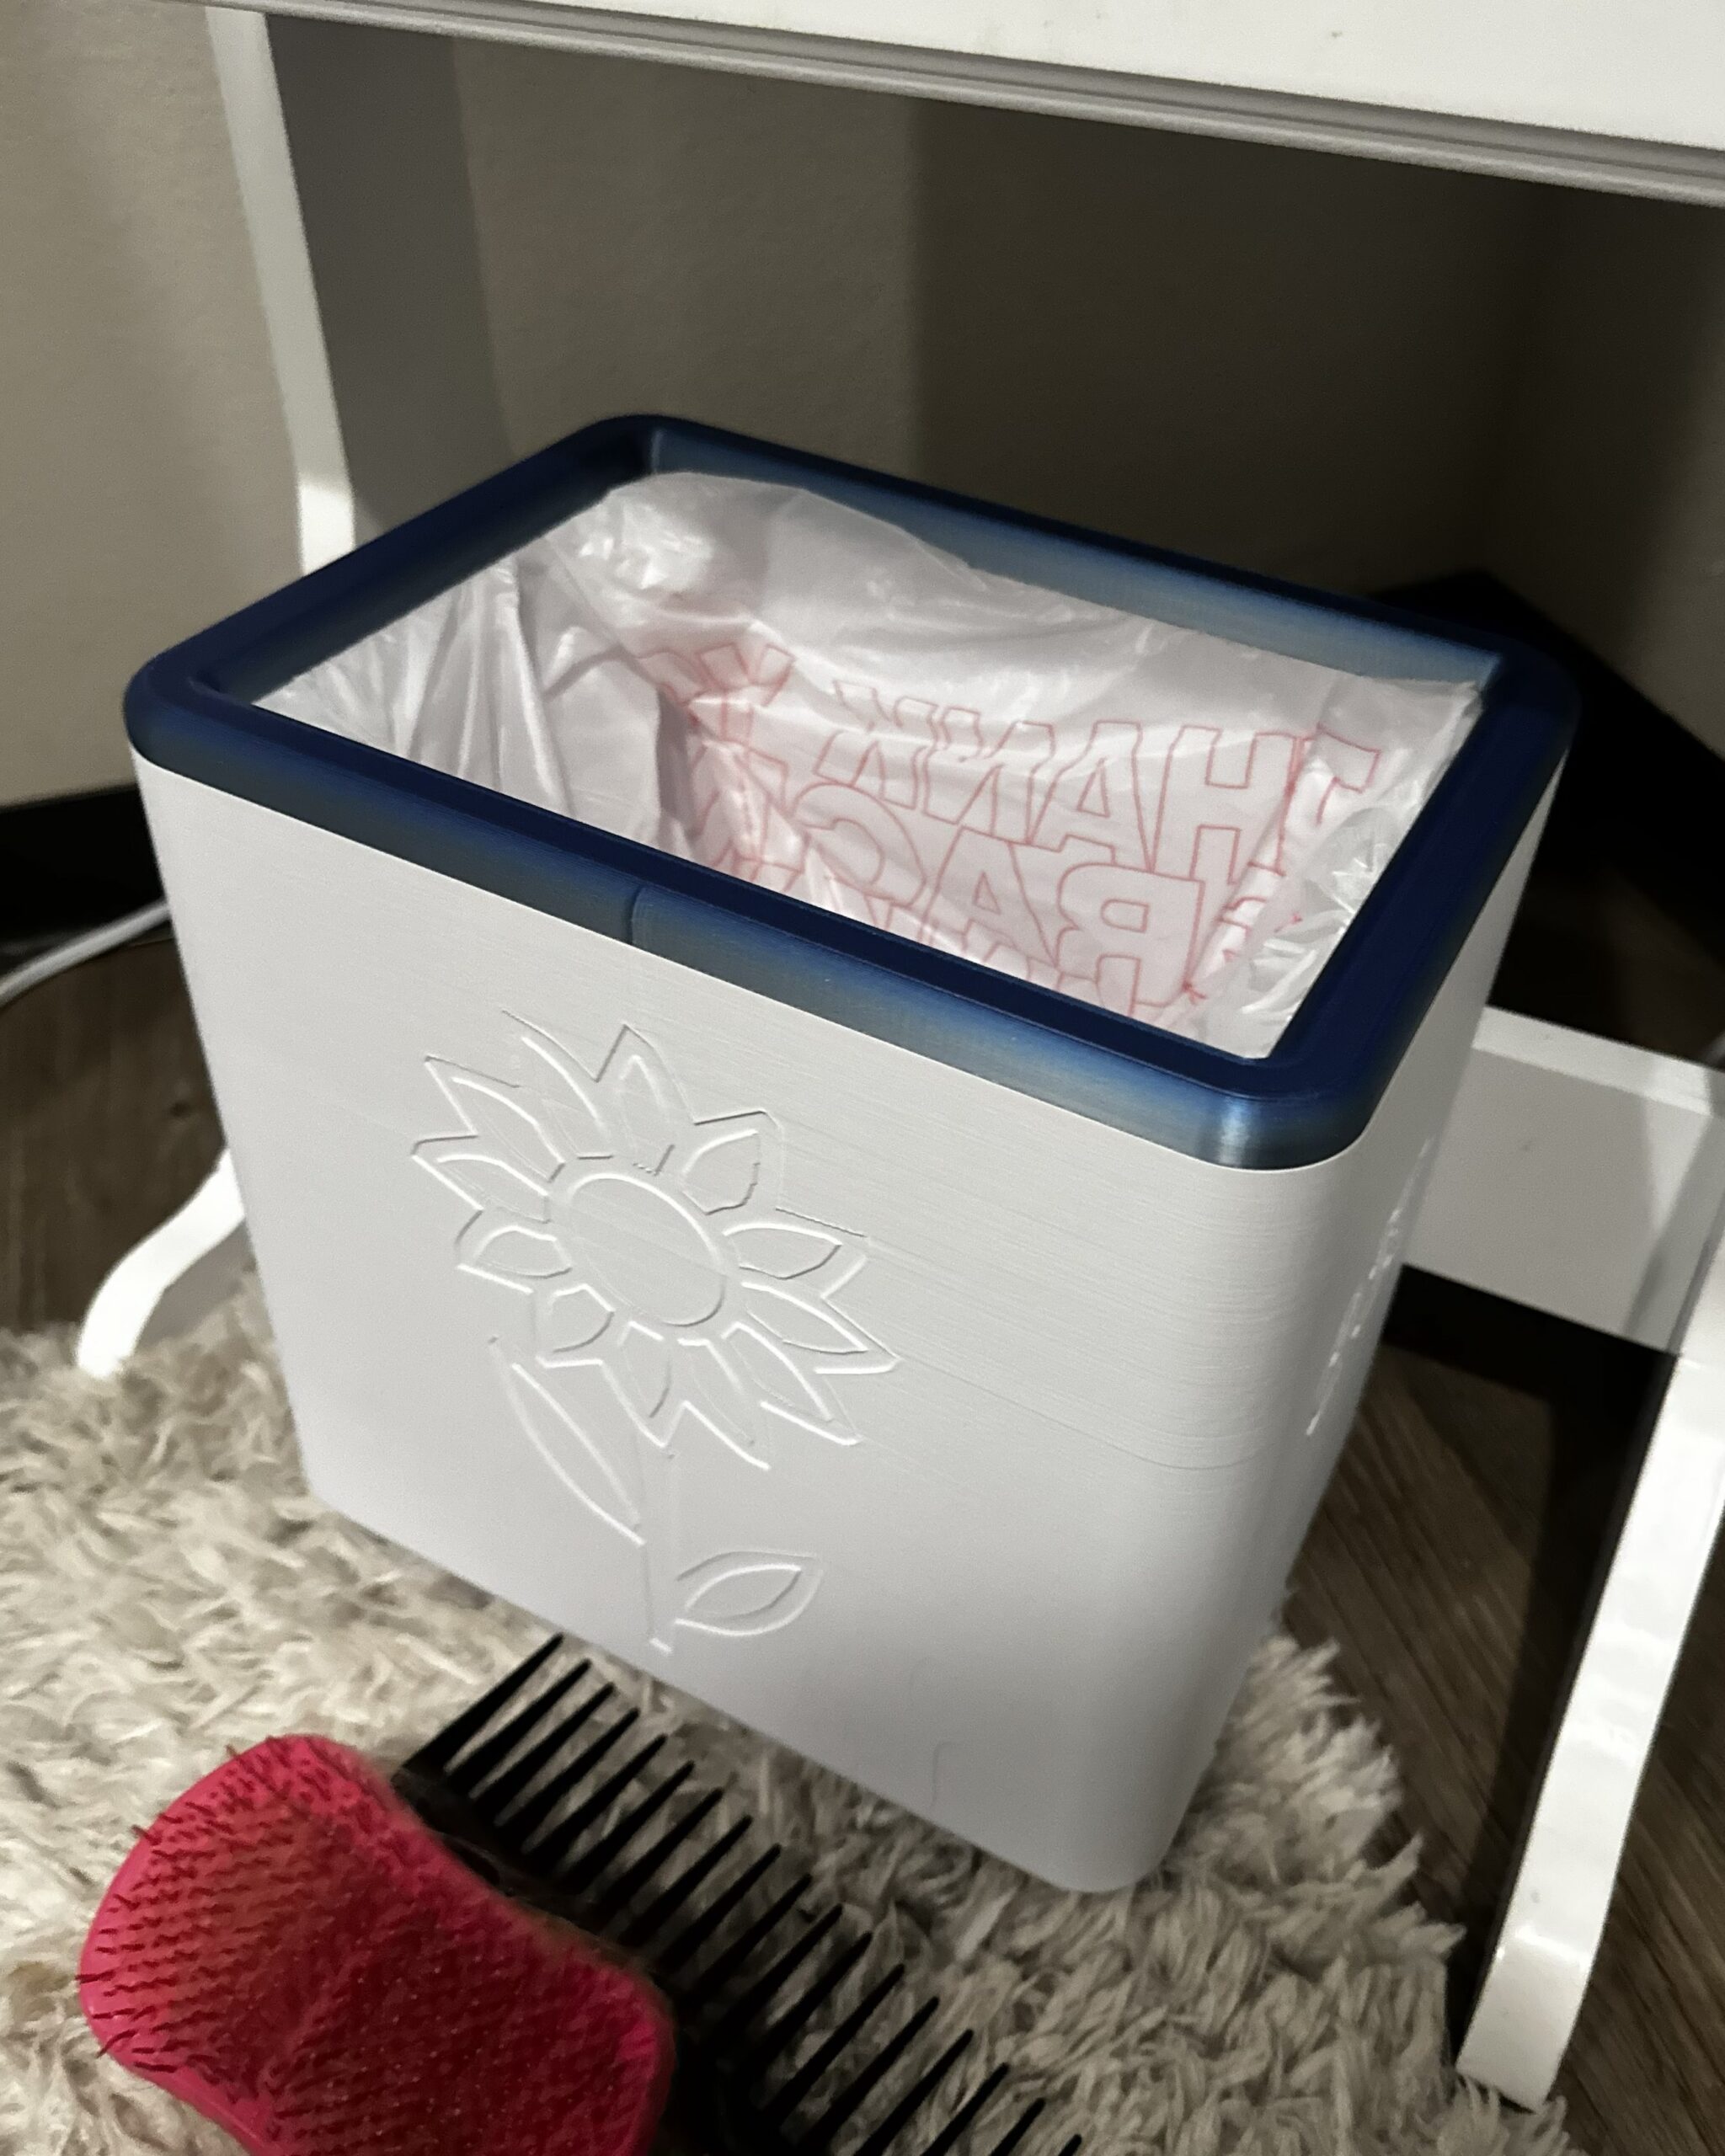
Overall, the assembly turned out great. The trash can looks polished while providing the ease of a traditional bag-in-can module and allows secondary use of plastic grocery bags. I’ve printed other versions for my siblings and friends, with improvements such as rim-only channels, circular designs, and filament-reduction methods.

20251029 205712002 ios

Finished assembly of trash can, with usable bag tucked away into lid
Stanley Tumbler Lid Toppers

20250614 151648657 ios

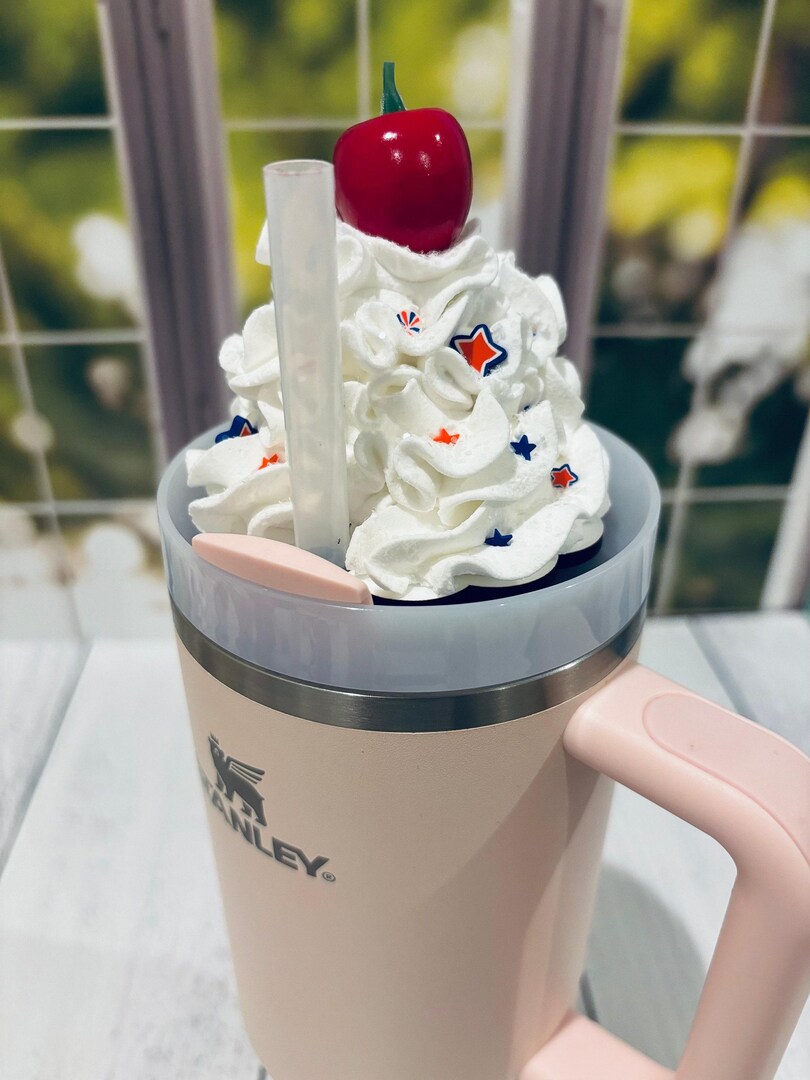
One of my first large 3D print projects came with an idea from one of my Collins coworkers. At the time, a large portion of my coworkers had the Stanley 40oz Tumbler, and accessories for these were bountiful across sites like Temu, Etsy, and others. However, there was a lack of 3D sports lid toppers, and that’s when my coworker asked if I could design something.

4611956390475803472

Cupcake topping purchasable from Michaels (Michaels)
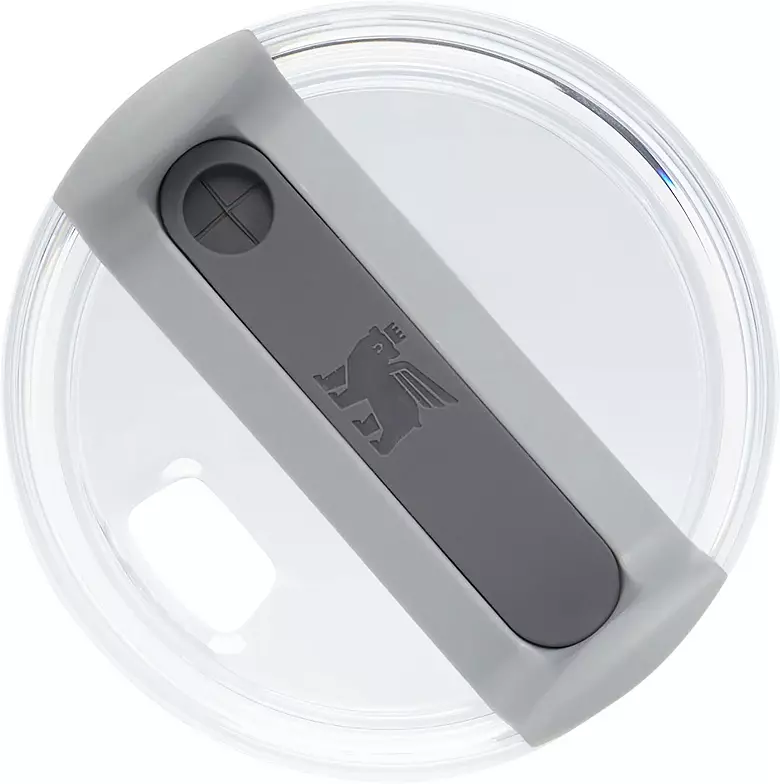
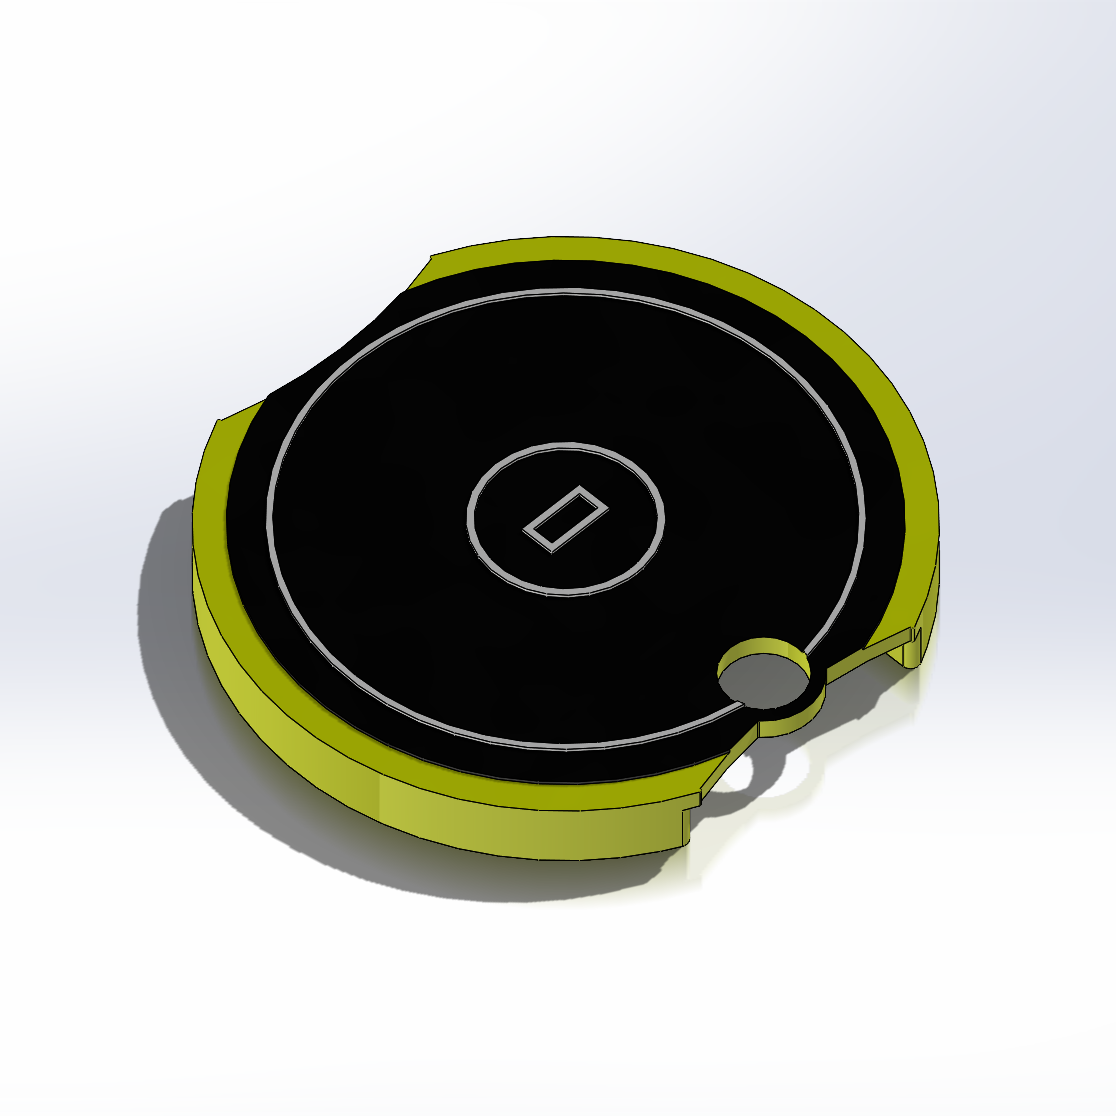
Intrigued, I said sure, and sourced one of their lids for measurement purposes. Once I had the base roughly modeled, I printed a couple of test runs to fine tweak any tolerances and get a snug fit.

img 2781

Stanley 40oz Tumbler lid used for measurements (Dick's Sporting Goods)
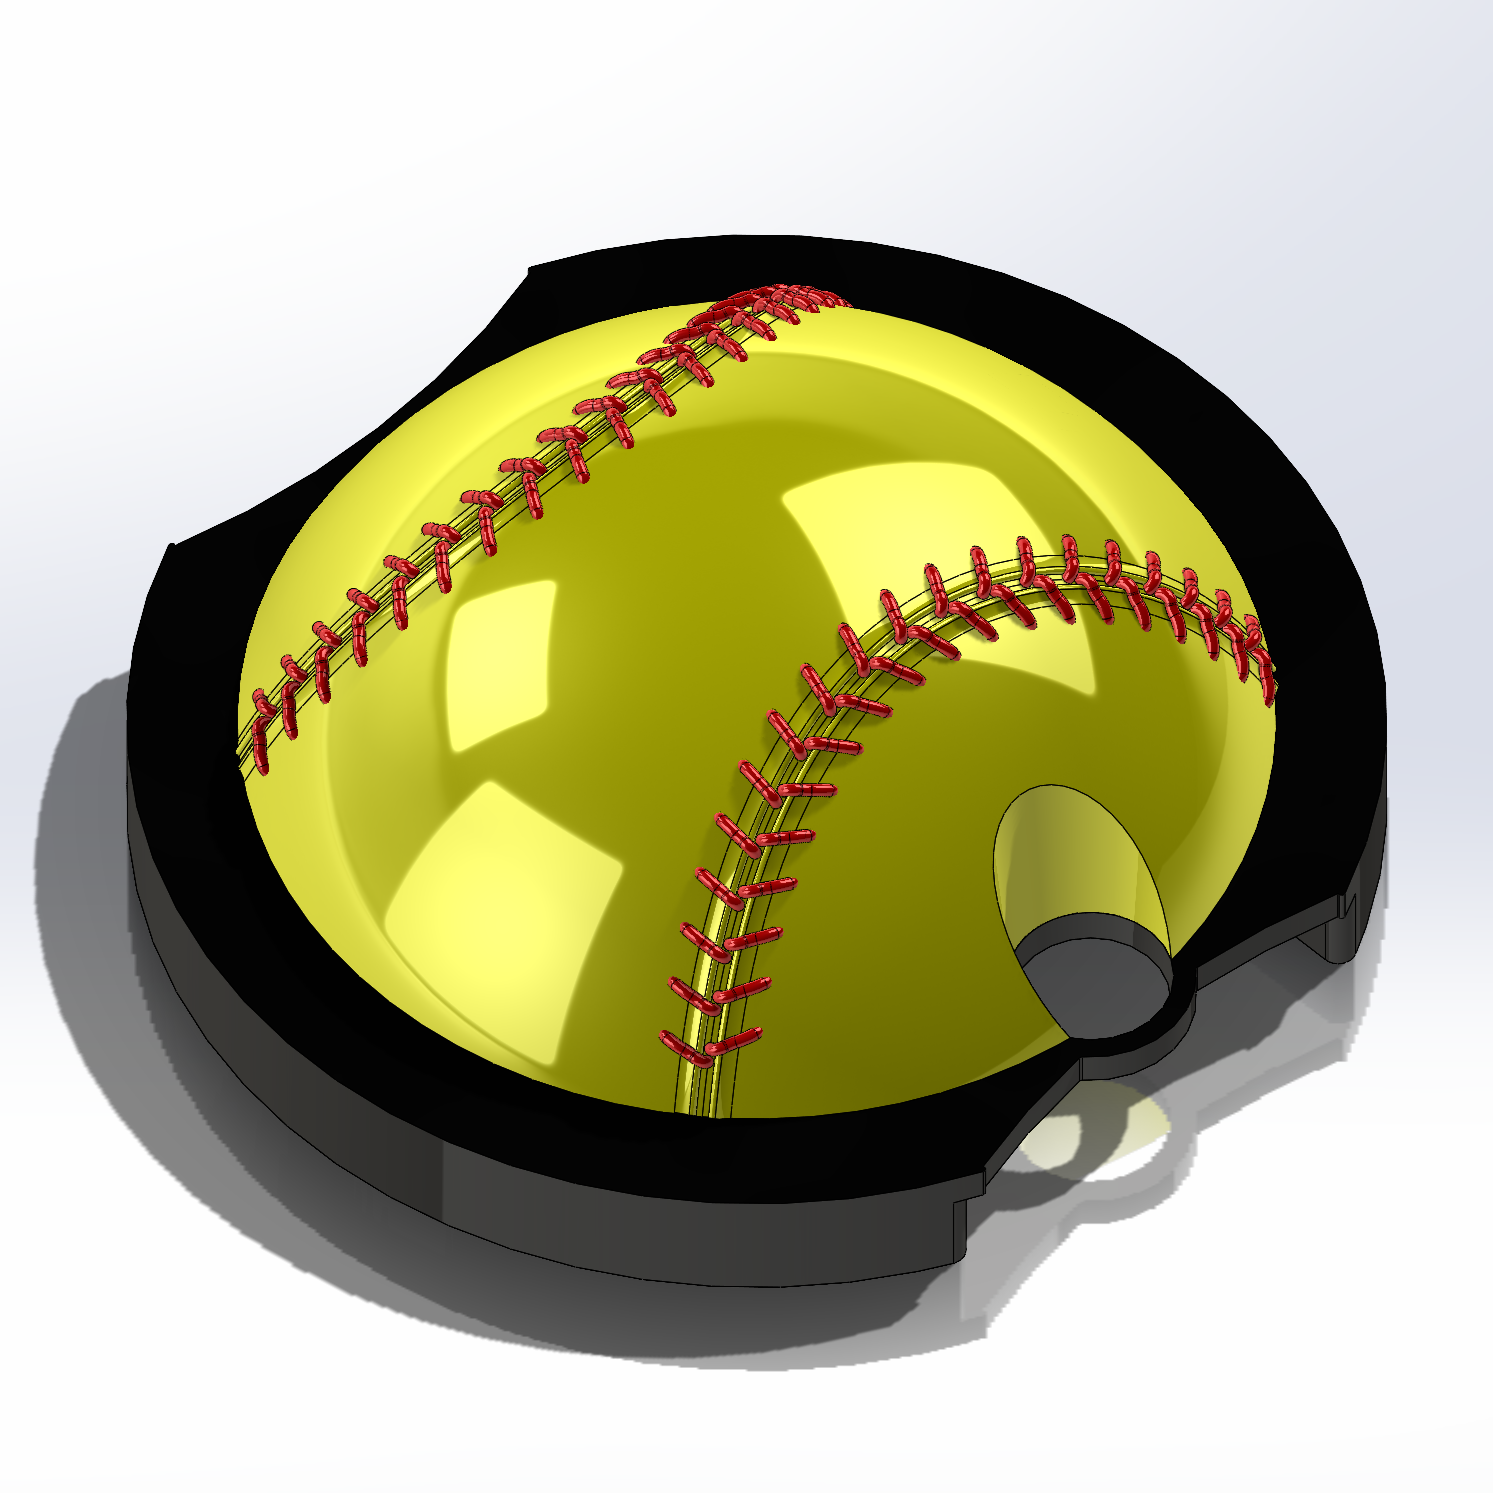
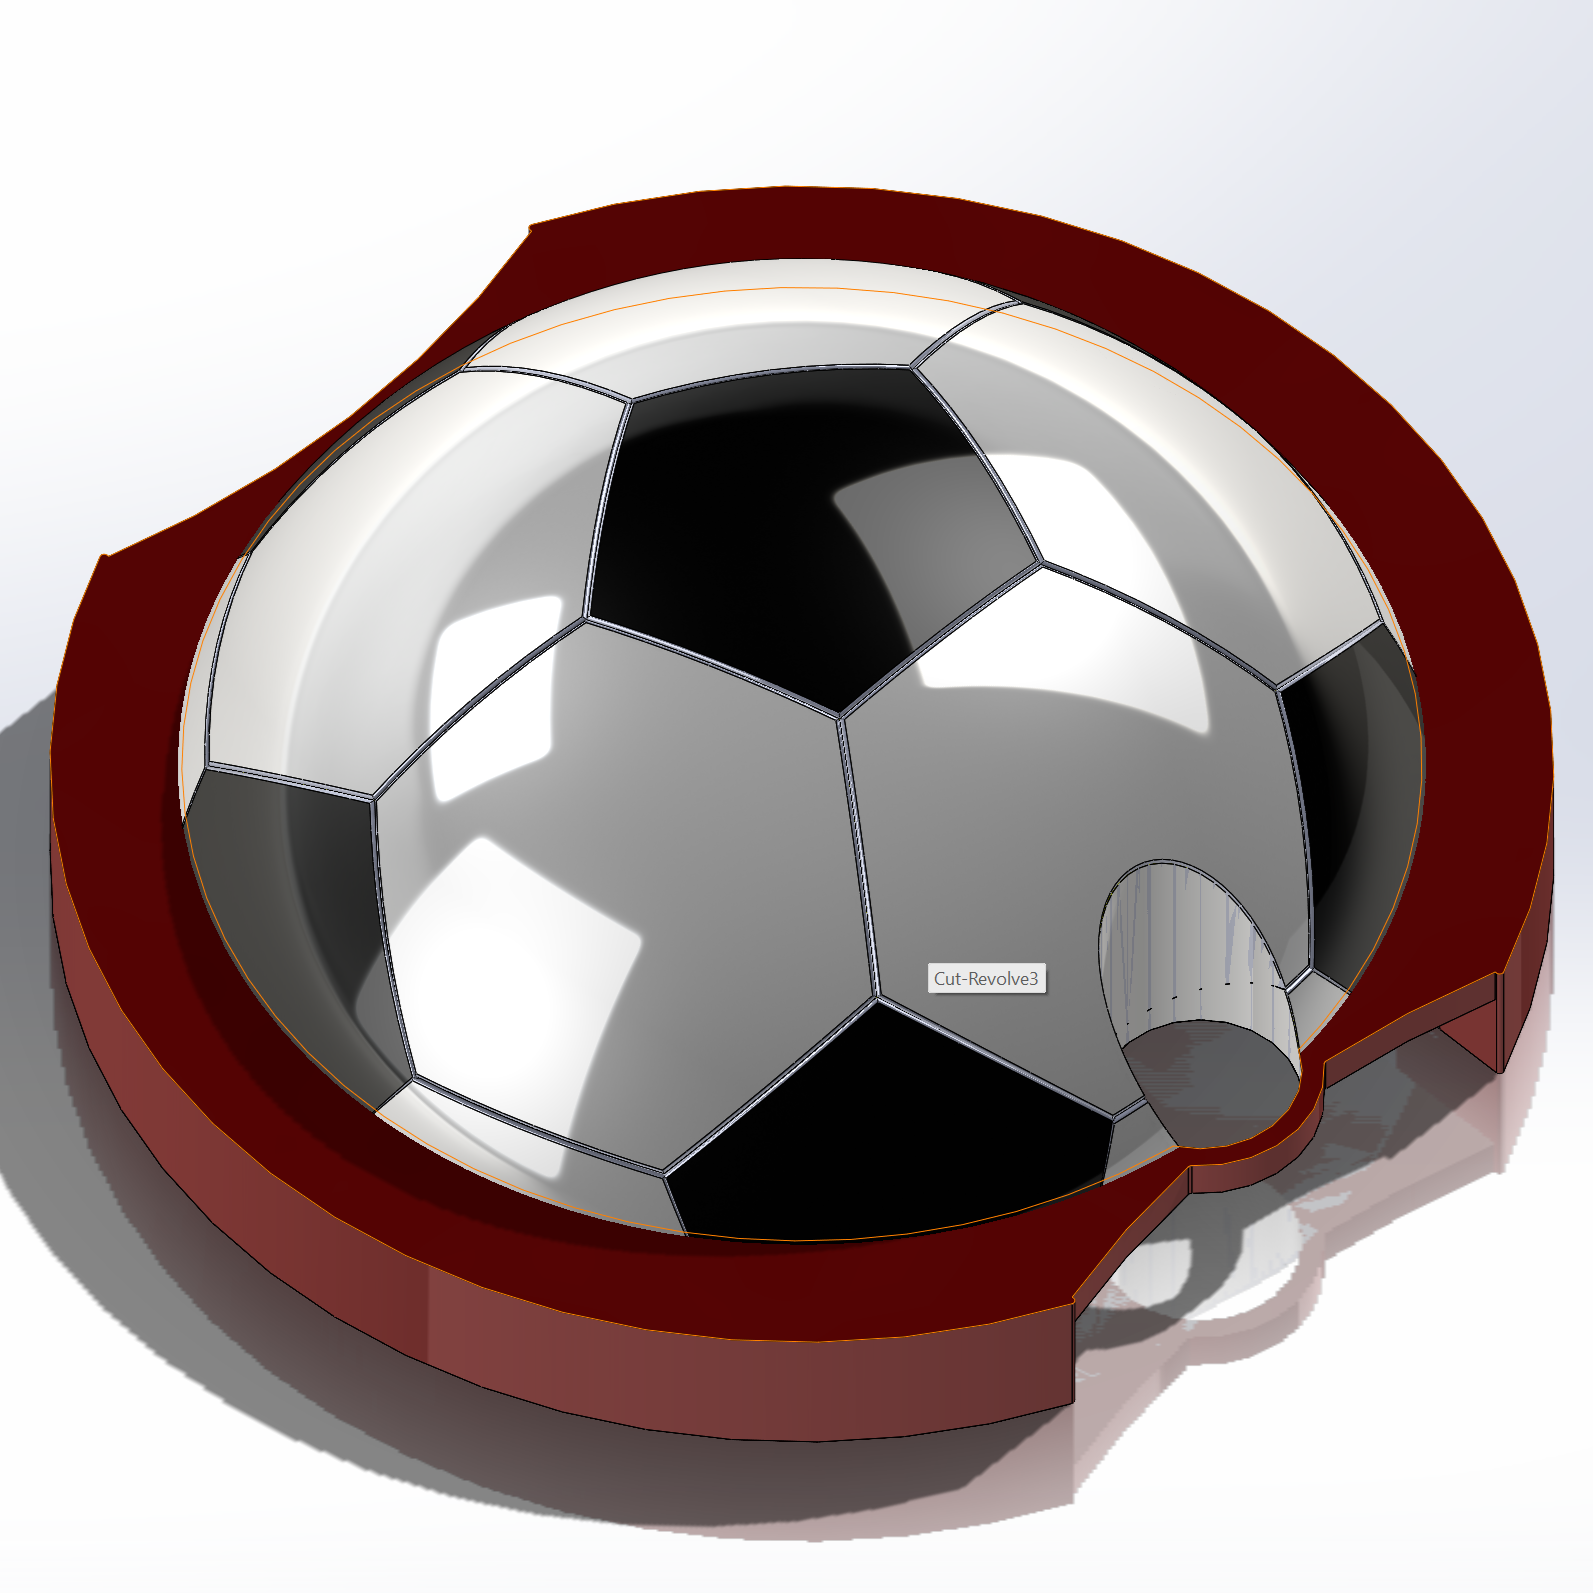
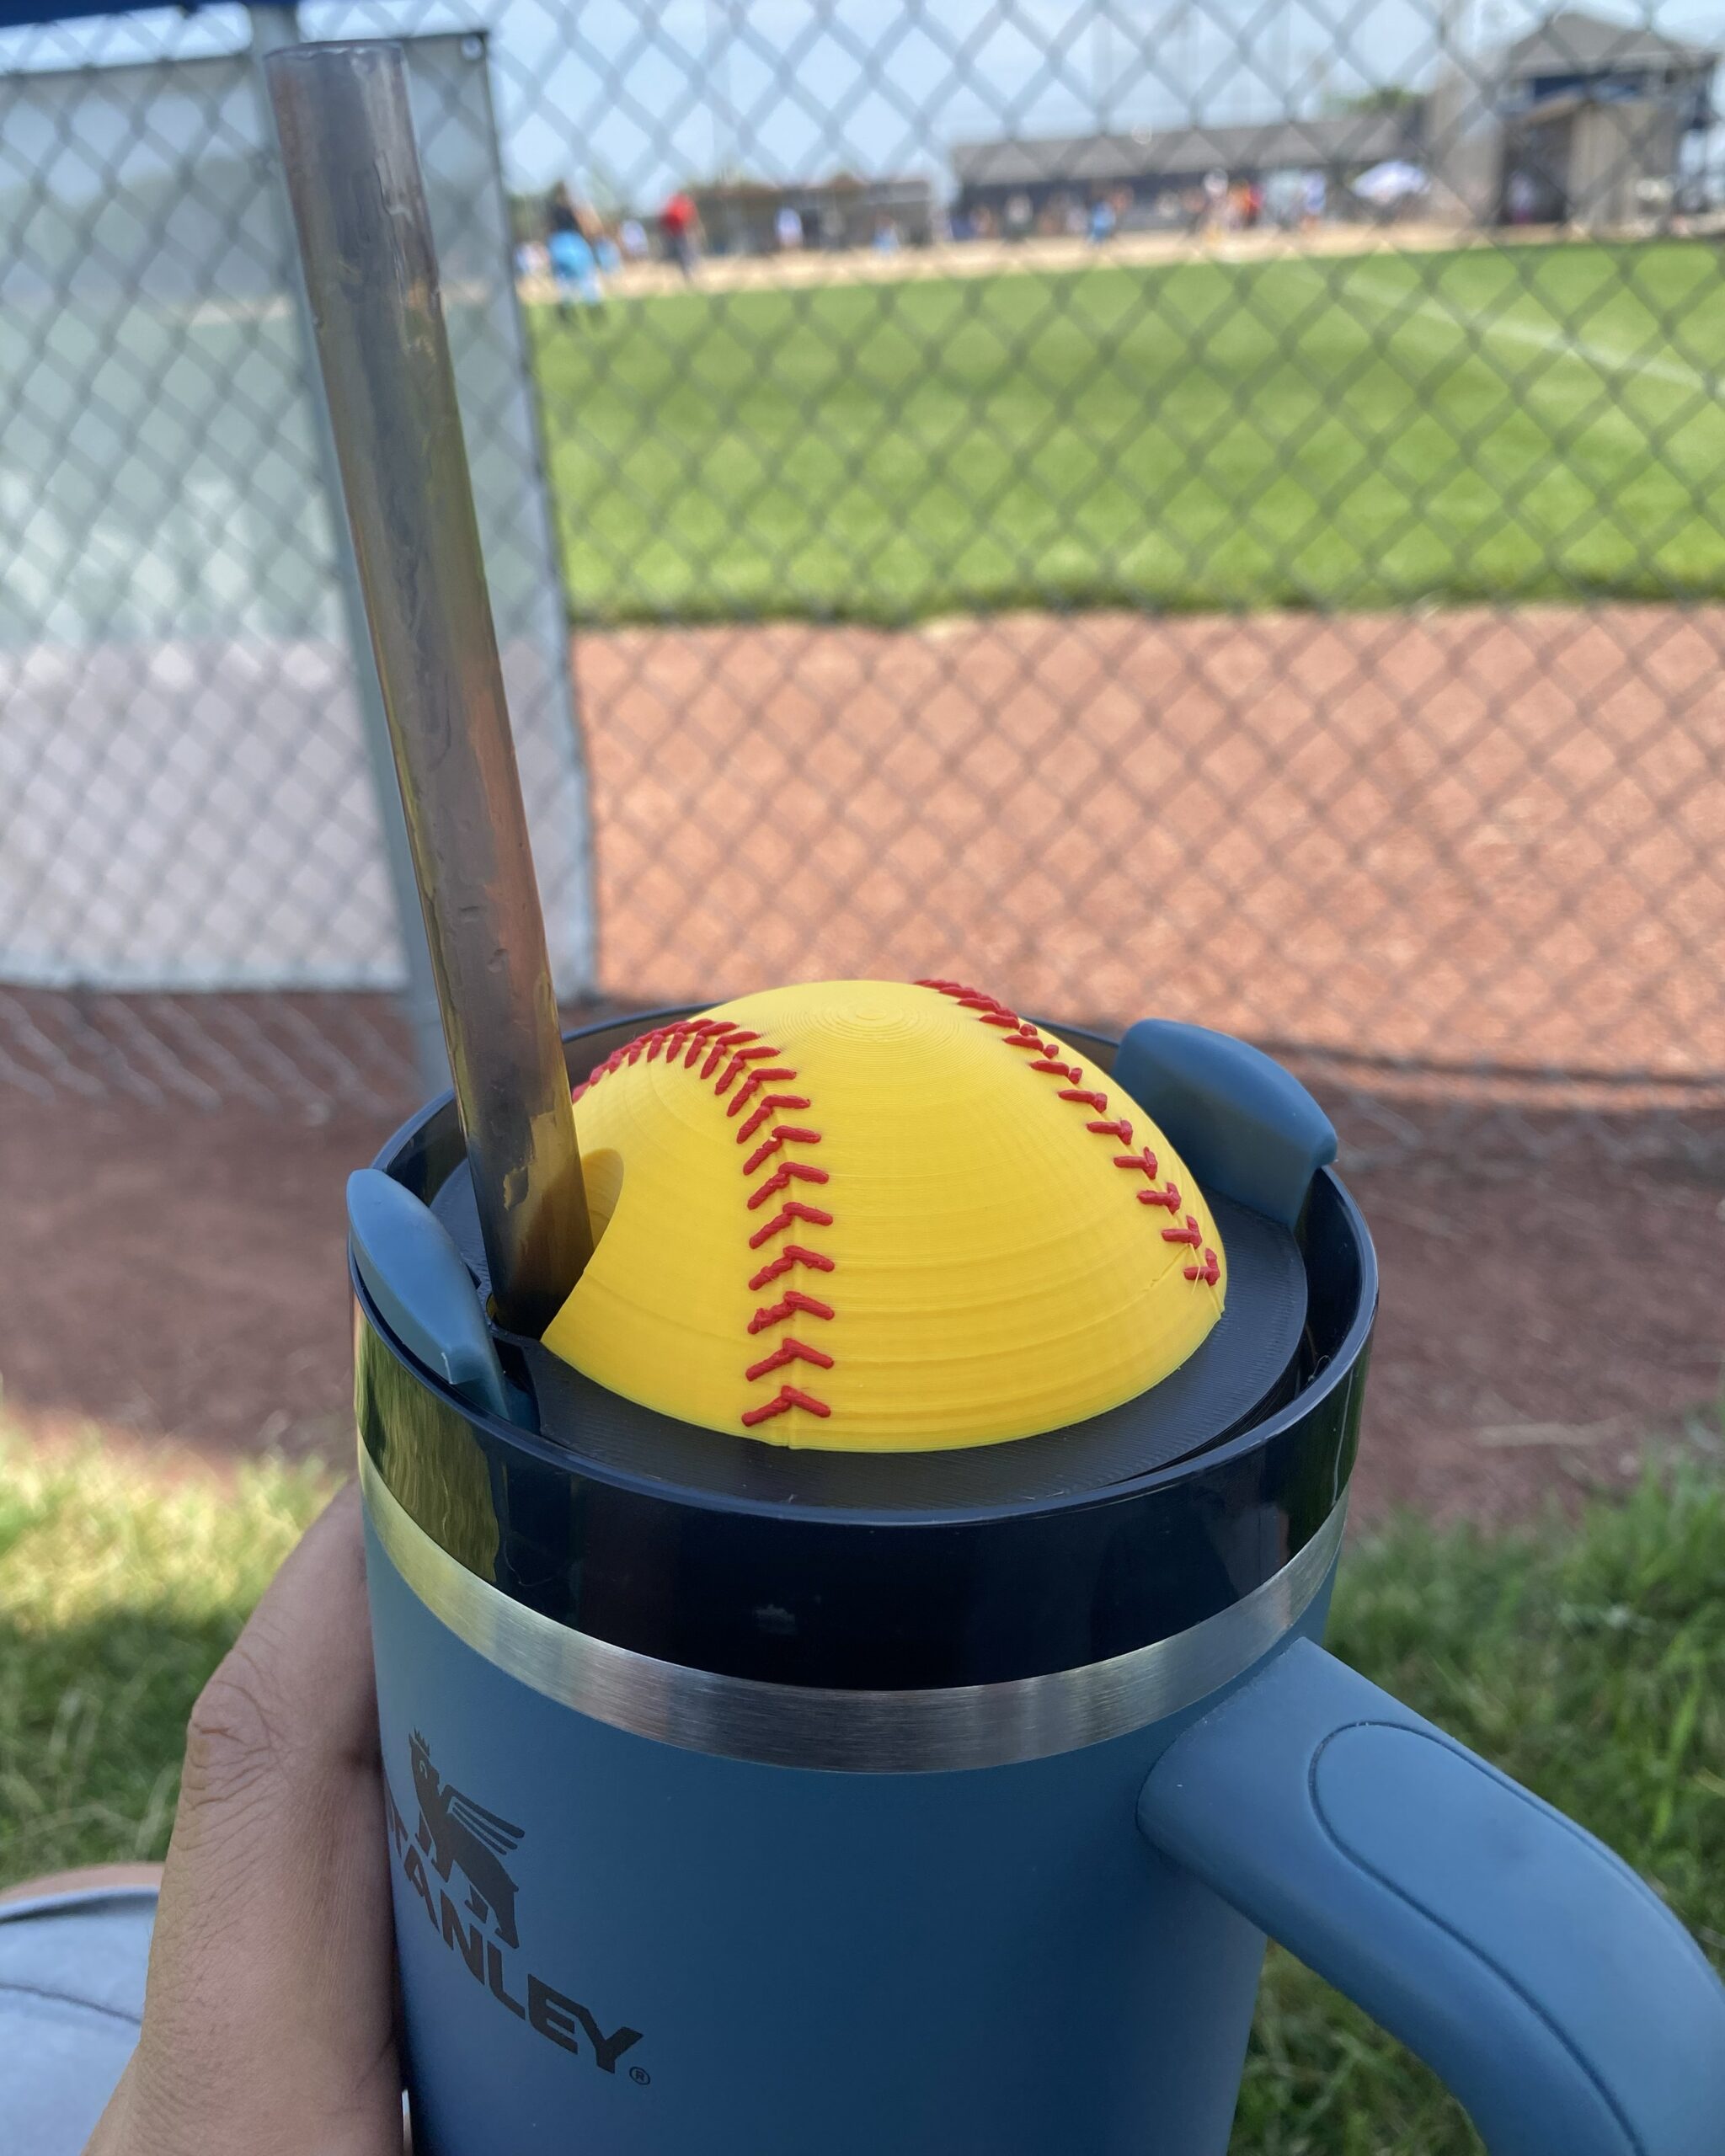
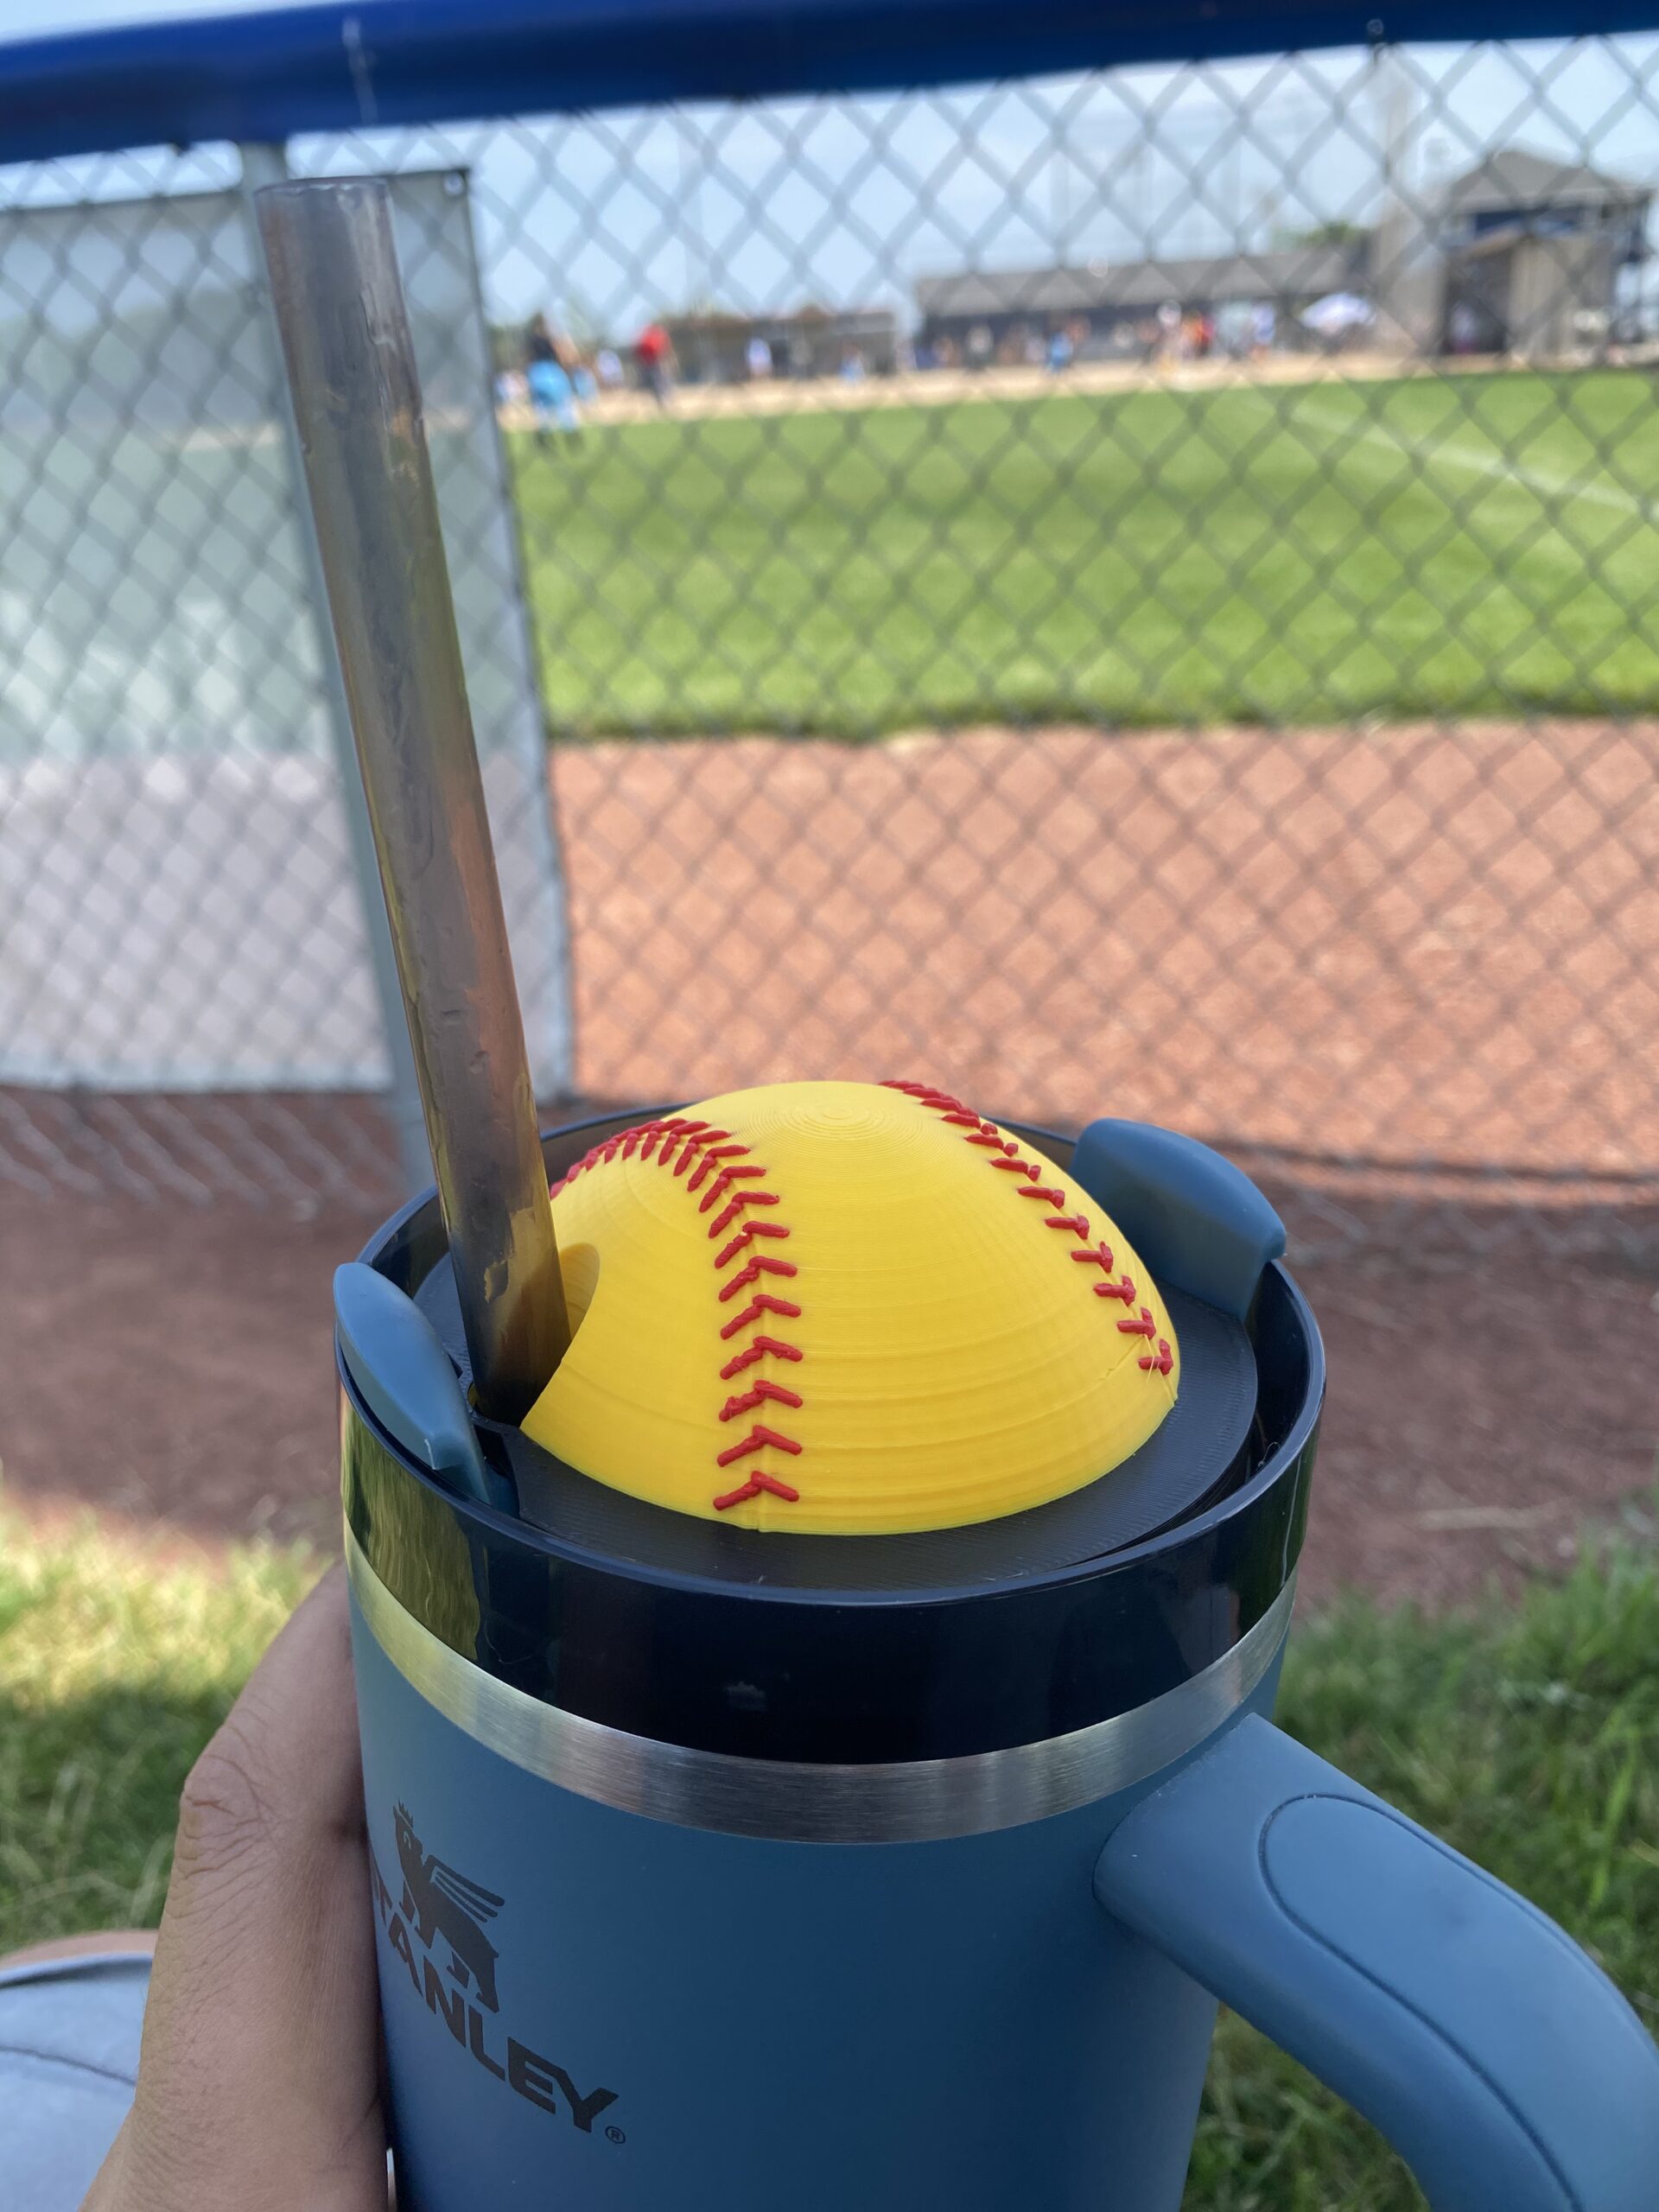
Once I achieved that, customization began. Several sports were commissioned by my coworkers, such as soccer, basketball, baseball/softball, football, and wrestling. Although some sports were easy, such as basketball, football, and wrestling, sourcing YouTube videos for how to model a life-like baseball, specifically stitching, and how to get soccer panels to line up, proved immensely helpful. Credit to both xPirated and 3DSolid (SolidWorks Tutorial), respectively, for their assistance in modeling these sports. Once I figured out how to model them, I simply spliced my base with the various designs and got to printing.

Softball, wrestling, and soccer ball designs as seen in SolidWorks

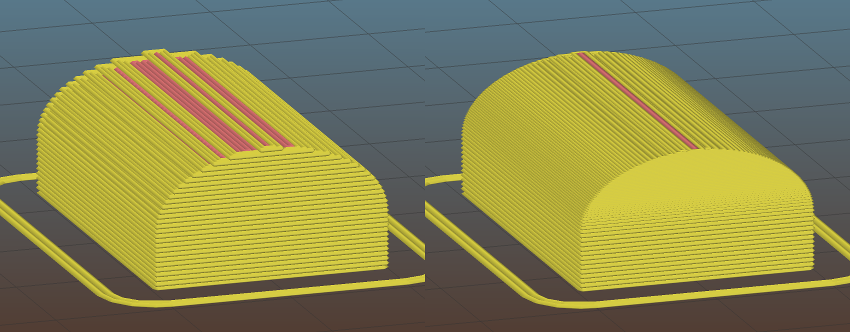
This was my first experience with multi-color prints, as well as variable layer lines. This was not printed on my printer, but my coworker’s, as this came before I had purchased my printer. As an FDM printer traditionally prints up, the layers become increasingly more visible as the pitch angle decreases. To account for this, the layers can print thinner, and thus, less visible, as the print ascends. However, the thinner the layers, the more time is spent printing, and the time can compound quickly, which is where the variable portion comes in. The variable layers begin closer to the top of the print, so it can maximize both speed and detail where they matter most.

model coarse adaptive layers

Non-variable layer height, left, vs. variable layer height, right (Slic3r Manual)
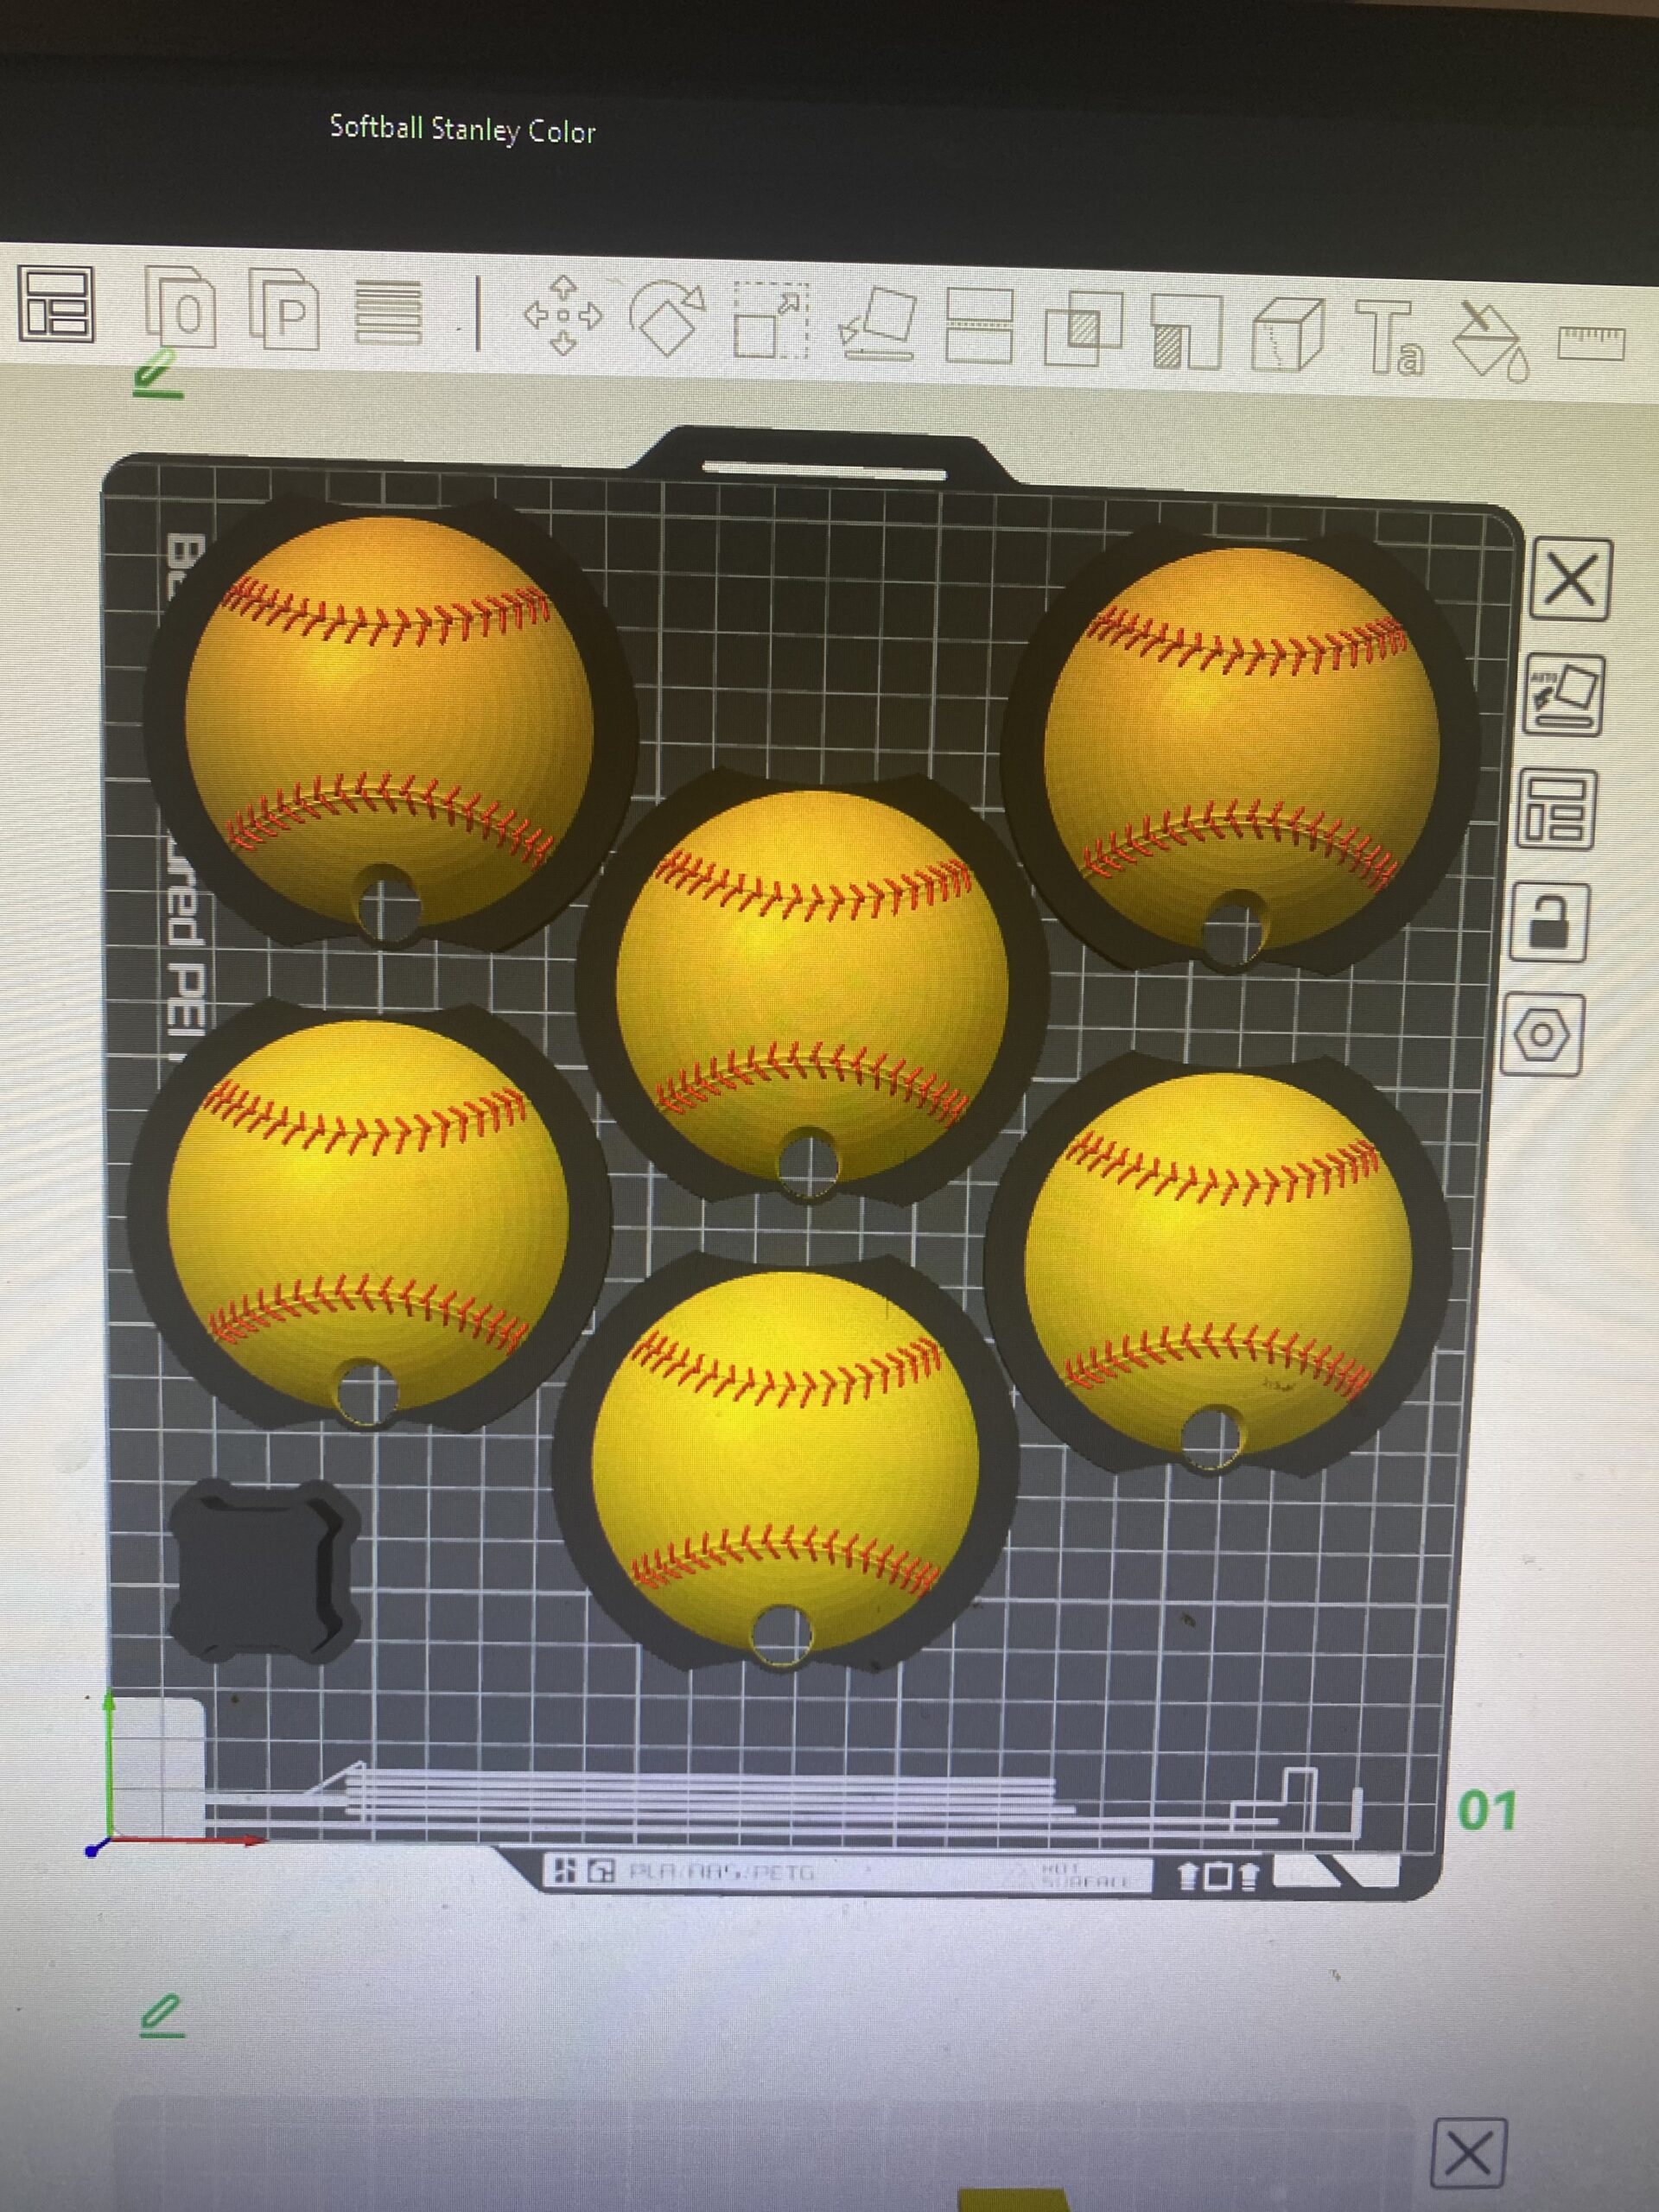
20250613 015315868 ios

Sliced file of six softball toppers, provided by my coworker

Although this project mainly ended up being a product for my coworkers around the office, being able to make them custom accessories around their kids, hobbies, etc. and brighten their days was worth the effort and learning I did throughout this project.

Engine Block Phone Stand

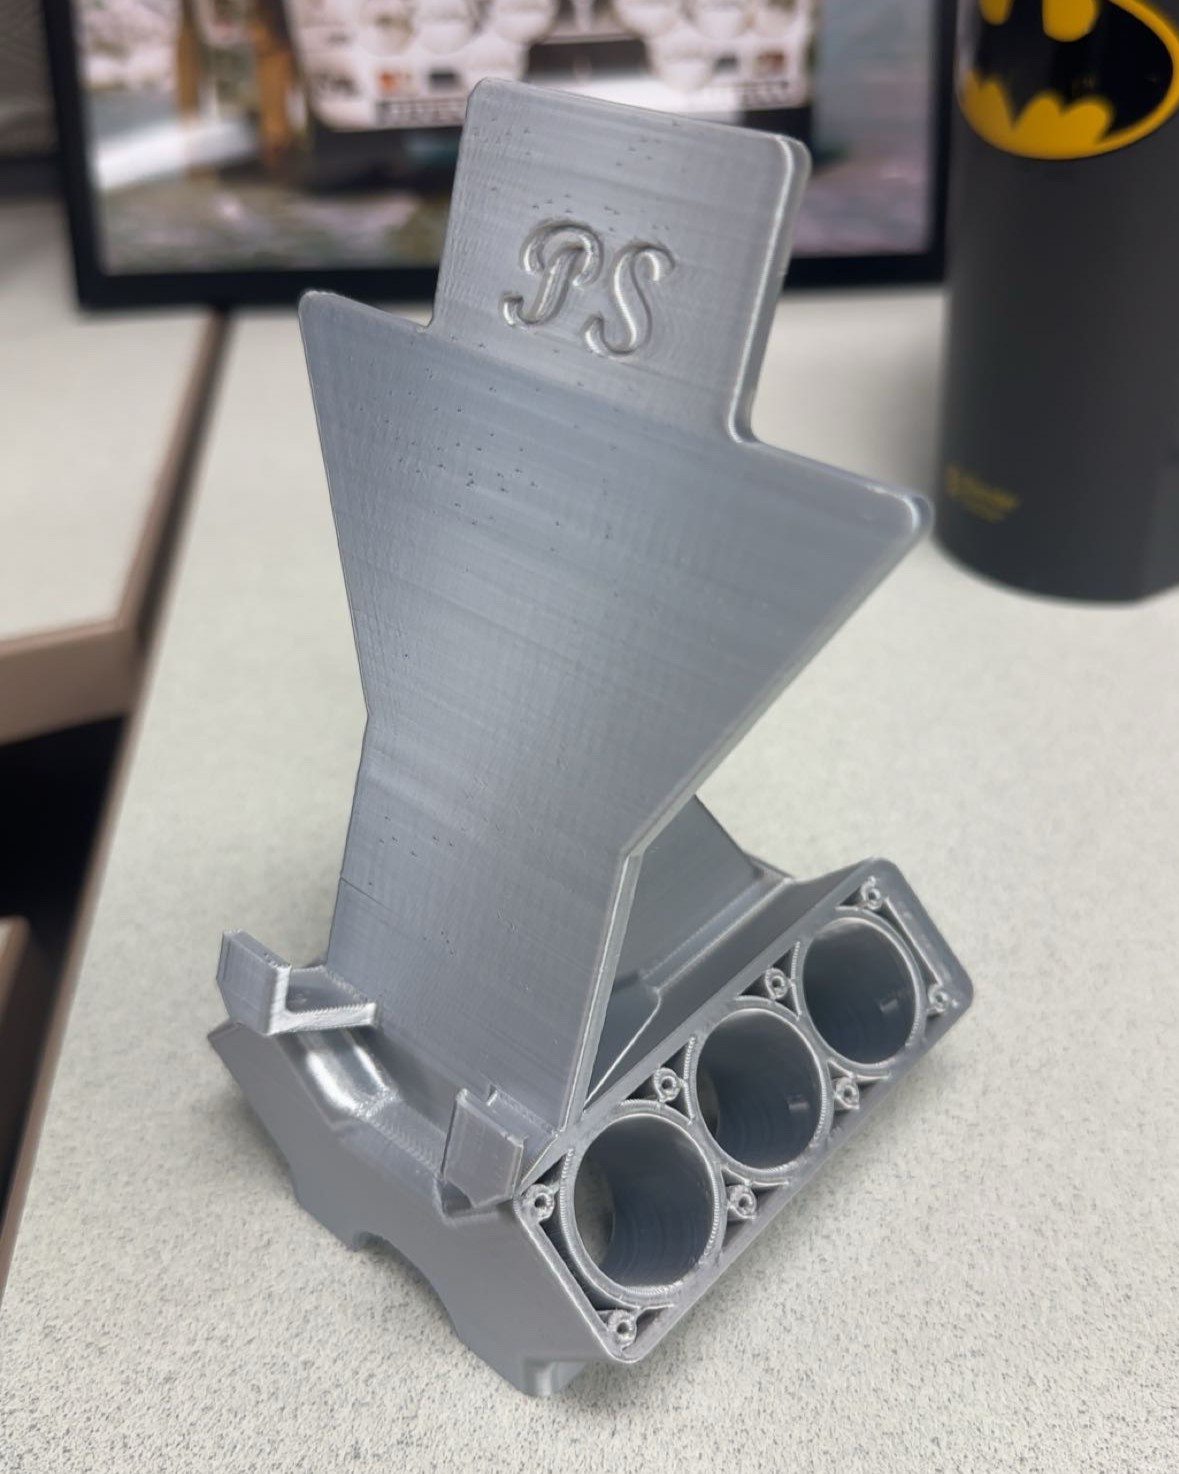
engine block phone stand

This project uses my twin-turbo V6 engine project as a starting point. For a brief recap, a personal project I worked on during my time at Collins was modeling a twin-turbo, V6 vehicle engine. Although it would probably not work in real life, the engine gave me great practice with various modeling techniques and working within large assemblies. Once I was done with that project, I was inspired by some of my coworkers’ phone stands to create a personalized phone stand using pieces from that project.

I ended up settling for my engine block for the base support. The engine block also has a semi-circular through hole for the crankshaft, which is perfect for threading and hiding a charging cable through.

In my model, I measured the critical dimensions of my phone and figured out what the scaling difference needed to be to get to my engine block size. This was necessary as my original engine block was modeled 1:1 to a real engine block. Once I had the scaling sourced and the phone stand modeled, I then reverted the entire model back down to phone-sized scaling and gave it a go with FDM 3D printing.

With my first print, I ran into several issues. The first one was the fact that I had made the small lip at the bottom too wide, and if I would put my phone down, sometimes it would slide towards the front, and this motion would cause the stand to tip. My second issue came with the stand part in that it was simply too flimsy. Finally, I ran into several cosmetic issues where the filament looked shiny in some parts, and extremely dull in others.

My first issue was simply resolved by tightening up the space between the main wall and bottom lip, as well as adding two rear “feet” to prevent tipping. The final two issues stemmed from my use of Silk PLA, as it was my first time using it. To fix the flexion issue, I added a central rib connecting the main wall to the top of the engine. Through research, I discovered that metallic-like filaments are extremely sensitive to speed changes throughout the printing process, which is something I had overlooked while printing. I lowered my max print speeds from 300mm/s to 100mm/s, as this was the slowest that was seen by the sliced file. With these changes made, a second print was run.

The second print turned out awesome. It fits my phone great, allows me to charge, and looks pretty cool in my opinion. If I had to change something, I might add spots for weights or magnets to be glued at the bottom, so it could not move around so much when removing or placing the phone. Overall, this was a great project I did with some exotic filament that introduced me to printing with more exotic-looking materials.

Scroll to Top